Rainbow Granny Check
Rainbows and Granny squares. They are an irresistible combination.
I think my fascination with little Granny squares began when I saw Sandra Cherry Heart’s Giant Granny Patches blanket. It was 2013 and, at the time, I was very new to crochet. The thought of tackling a project so huge felt impossible, but I was mesmerised.
A couple of years later I began my first attempt. In my mind, I could see a subtle rainbow check pattern. It almost worked, but the colours weren’t quite right. It ended up consigned to the WIP (work in progress) pile and that was the end of that.

Attempt number one was consigned to the WIP pile…
But some ideas just won’t go away. So last year, with a stash considerably bigger than in 2015, I thought I would give it another try.
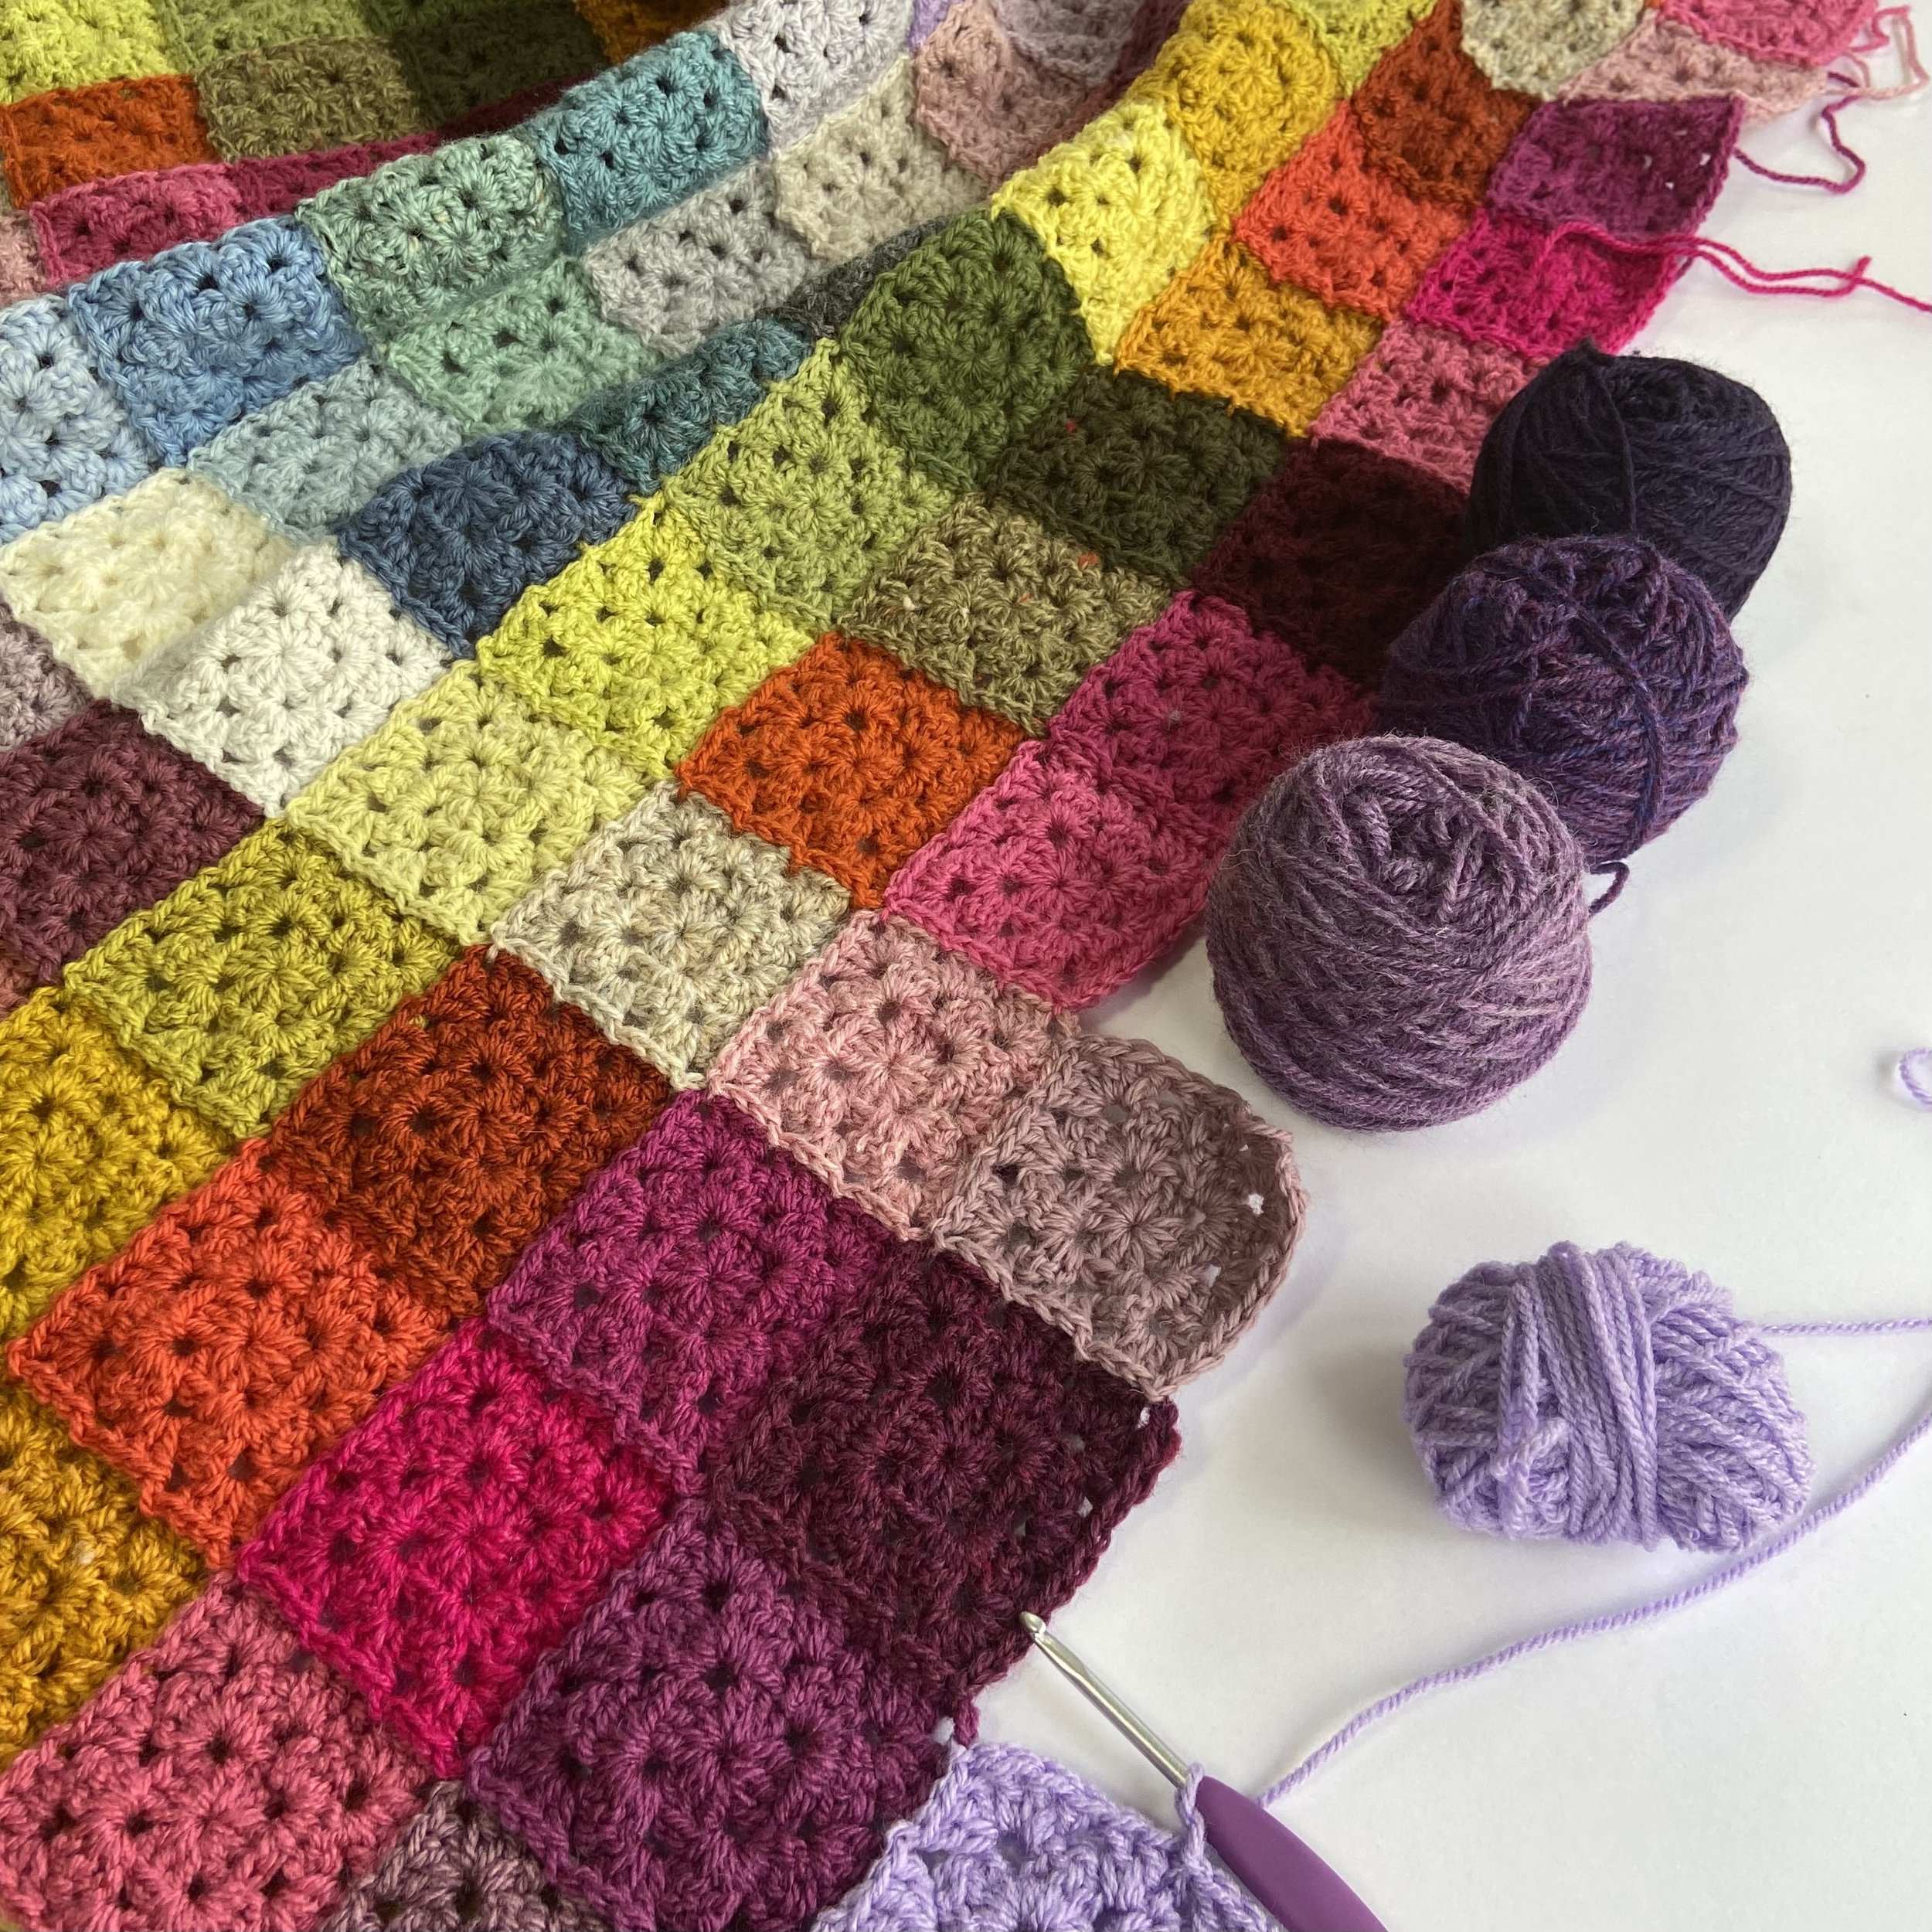
I spent a happy evening on the floor of my yarn room pulling out colours and making a huge creative mess. The very best kind of mess! I chose 49 different yarns, all selected purely for the colour. They’re a mix of acrylics, wool, and a couple of merino blends. The only rules were they had to be DK and from my stash. No buying!
Part of the charm of Granny squares for me is the simplicity. This is a soothing pattern; easy to pick up and put down. I keep the yarns in a footstool in my kitchen so it’s always handy when I have 5 minutes to spare.

I keep the yarns in a footstool in my kitchen so it’s always handy when I have 5 minutes to spare.
If you would like to make one…
You will need:
4mm hook or appropriate hook for your yarn weight.
Scissors
Yarn needle
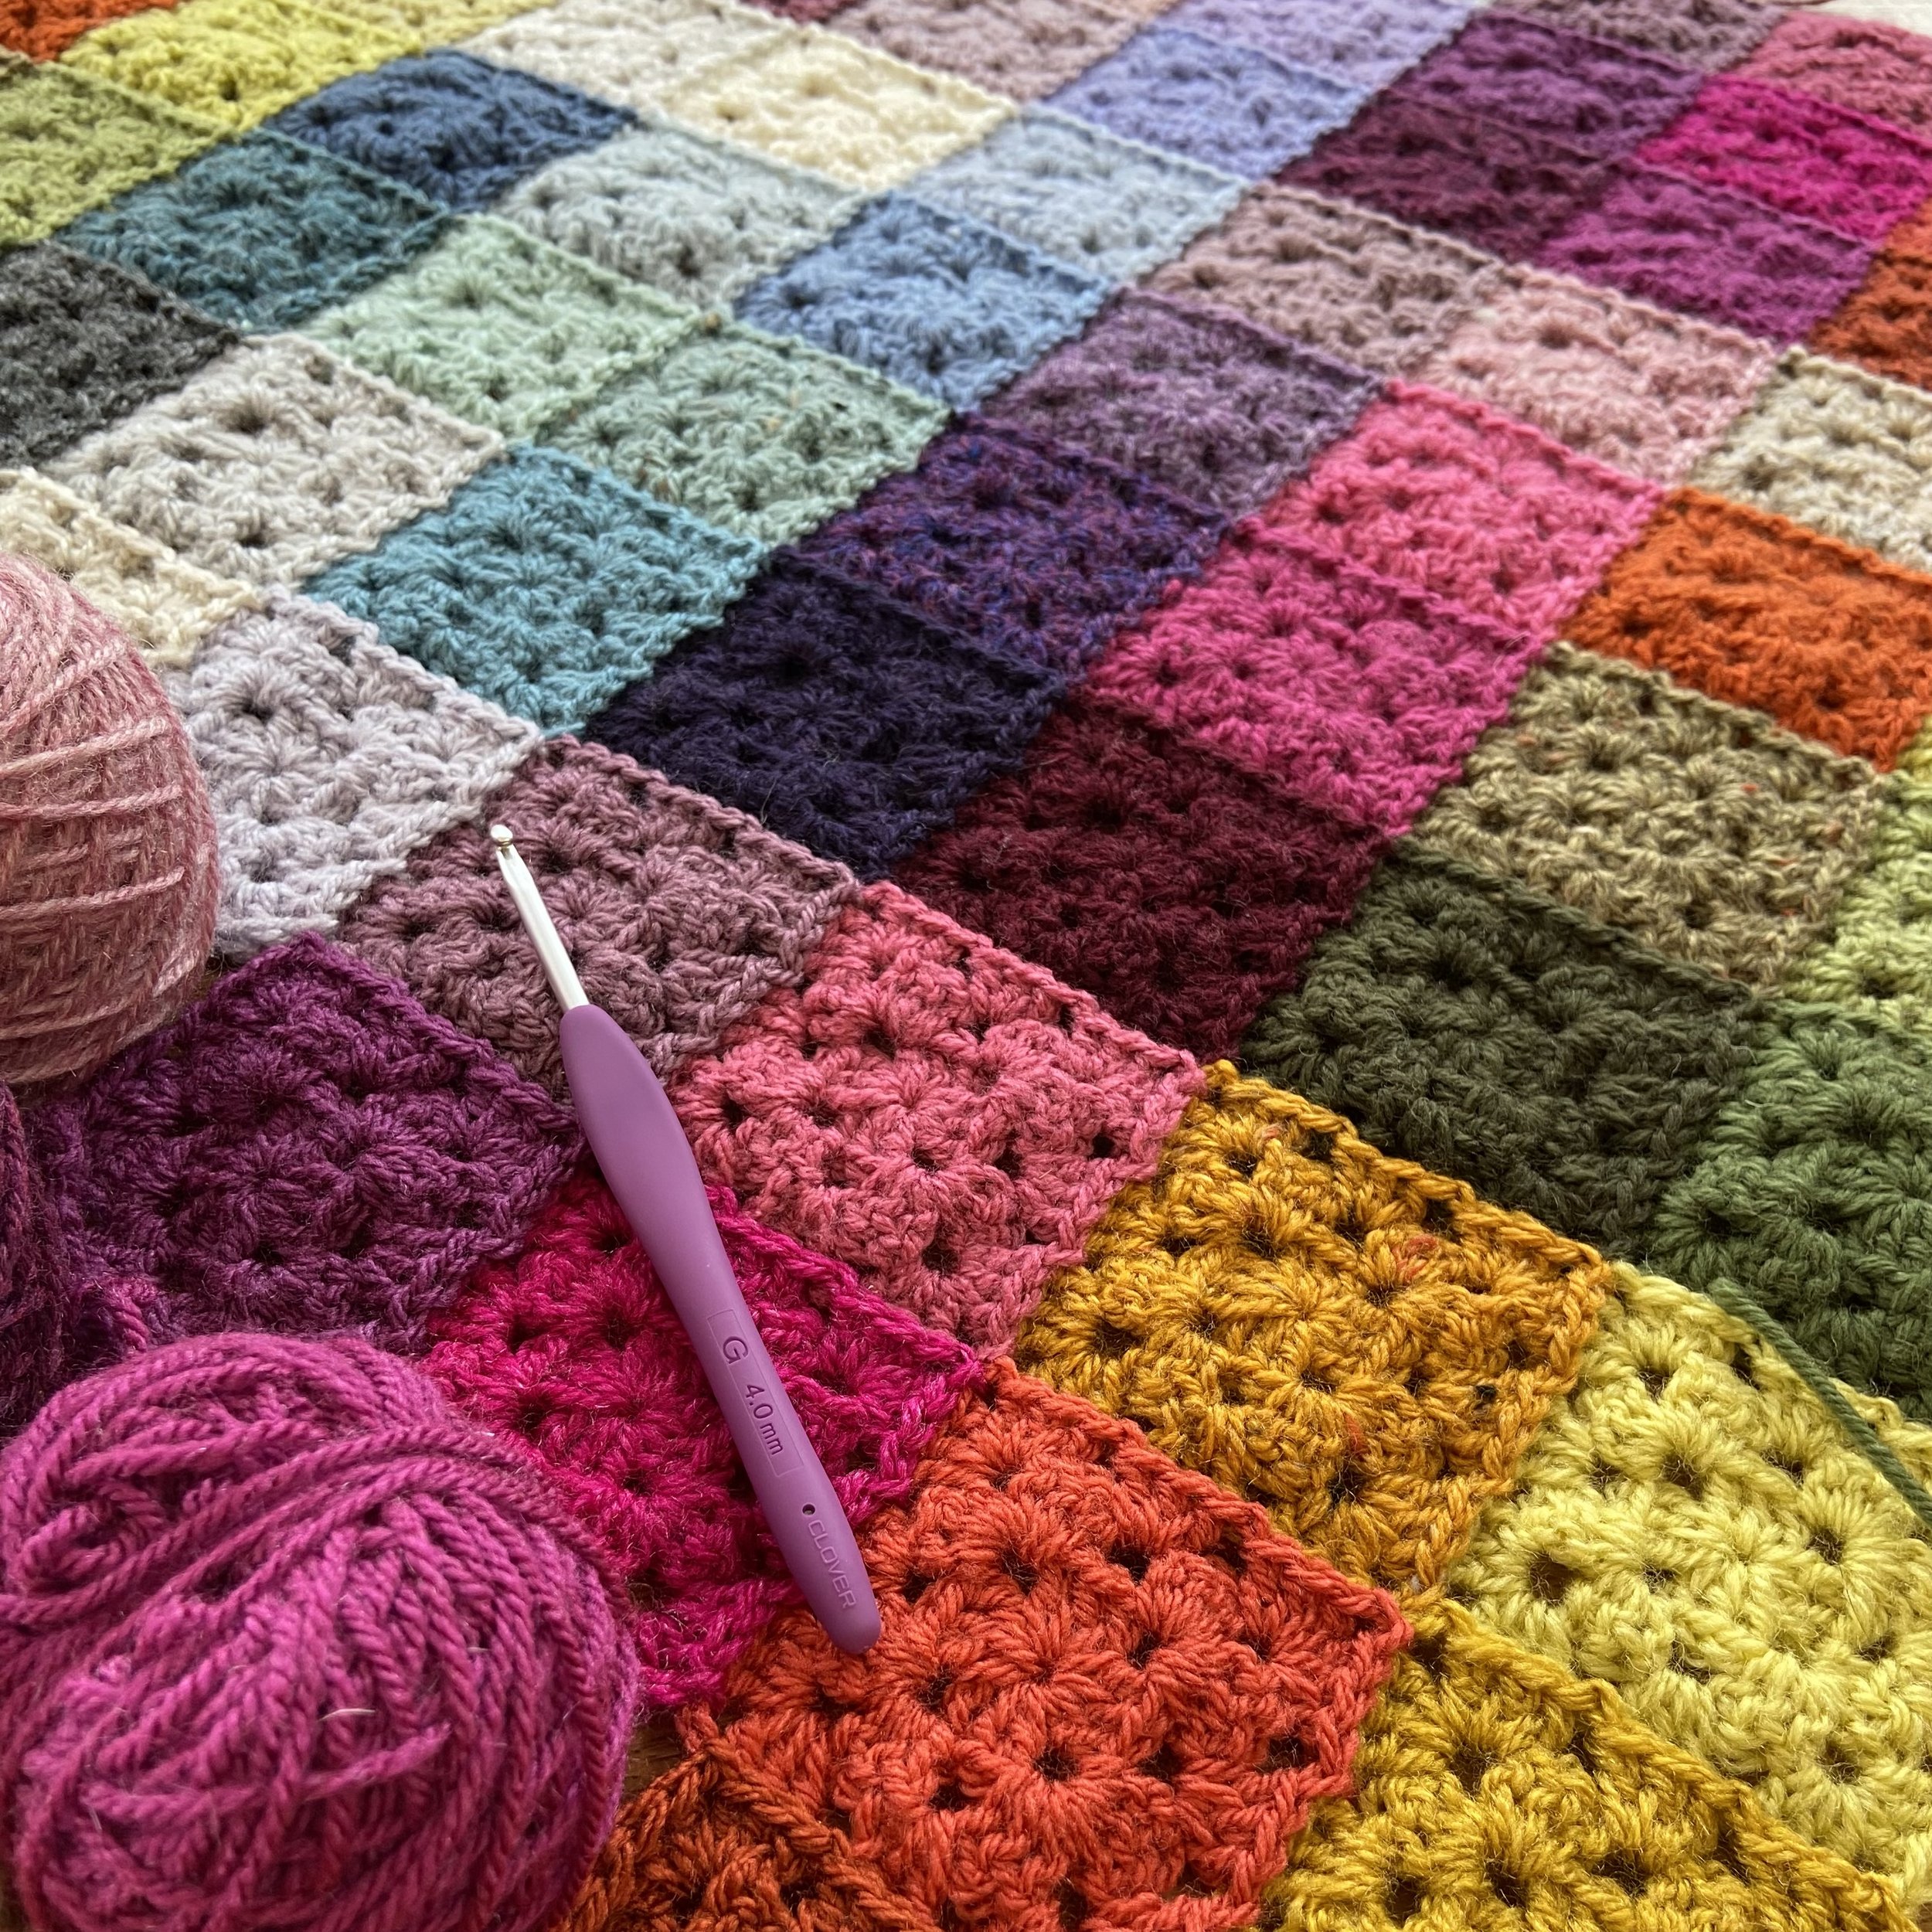
49 different shades of yarn, all the same weight. You will need about 50-60g of each one to complete 9 pattern repeats. This will give a finished blanket size of approx 135 x 135cm, excluding a border. Of course, you can make any size you like. I used DK and I have listed the colours I used in bold. For each, I have tried to suggest at least one alternative yarn, but have a rummage through your stash and I’m sure you will find lots of other substitutes. Don’t be afraid to mix fibres. I have used acrylic, wool and blends and they all seem to pull together perfectly. Nepps and marls will work perfectly well too. It all adds to the character.
TIP - If you are using one of the thicker DK yarns, such as Drops Karisma or Sirdar Hayfield Bonus, use a 3.5mm hook, just for those squares.

Stylecraft Life - Zing, Sirdar Country Classic Chartreuse,
Cygnet - Barley, Stylecraft Special - Mustard, Scheepjes Colour Crafter - Coevoorden
King Cole Baby Big Value Tweed - Amber, Stylecraft Special - Gold
Stylecraft Special - Tomato, Scheepjes Colour Crafter - Vlissingen
Scheepjes Colourcrafter - Tiel, Stylecraft Special - Raspberry
Cygnet - Cerise, Scheepjes Colour Crafter - Apeldoorn, Stylecraft Special - Bright Pink
Stylecraft Special - Lime, Scheepjes Colour Crafter Delfzijl
Stylecraft Special - Copper, Scheepjes Colour Crafter - Breda
Stylecraft Special - Magenta, Scheepjes Colour Crafter - Kortrijk
Stylecraft Special - Grape, Scheepjes Colour Crafter - Hoorn
Stylecraft Special - Plum, Scheepjes Colour Crafter - Meppel
Stylecraft Life - Cranberry, King Cole Pricewise - Shiraz
Sirdar Country Style - Tana, Scheepjes Colourcrafter - Leiden.
Stylecraft Life - Oatmeal, Scheepjes Colourcrafter - Hasselt, Cygnet - Harvest
Stylecraft Life - Rose, Stylecraft Special - Pale Rose
Jarol Heritage (Long Discontinued), Use King Cole Pricewise Fallow, or James C Brett Light Lavender.
Stylecraft Special - Parma Violet, Scheepjes Colour crafter - Helmond
Stylecraft Special - Lavender, Scheepjes Colour Crafter - Heerlen
Stylecraft Special - Bluebell, Scheepjes Colour Crafter - Rhennen
Drops Karisma - Light Sky Blue, King Cole Big Value Baby - Sky
Scheepjes Colour Crafter - Delfzijl, Stylecraft Special Pistachio
King Cole Big Value - Rust, Cygnet - Burnt Orange
Stylecraft Life - Lily, Scheepjes Colour Crafter - Luik
Stylecraft Life - Heather, Sirdar Hayfield Bonus - Neon
Jarol Heritage - Saxe, Stylecraft Life - Aster, Scheepjes Colour Crafter - Middelberg
King Cole Pricewise - Oyster, Stylecraft Special - Parchment
King Cole Merino blend - Carnation, Scheepjes Colour Crafter - Venlo
King Cole Pricewise - Fallow, Sirdar Hayfield Bonus - Lilac
Stylecraft Life - Cream, any cream will do.
Stylecraft Life - Ice Blue, Sirdar Country Classic - Mint Blue
Stylecraft Life - Fern, Stylecraft Special - Meadow, Scheepjes Colour Crafter - Assen
Sirdar Harrap Tweed - Gallop, Sirdar Hayfield Bonus - Taupe
Stylecraft Life - Fuchsia, Stylecraft Special - Fuchsia Purple
Stylecraft Life - Deep Purple, Stylecraft Special - Proper purple
Stylecraft Life - Duck Egg Nepp, Stylecraft Special - Sage
Stylecraft Life - Mint, Stylecraft Special - Duck Egg
King Cole Pricewise - Fudge, Stylecraft Special - Mocha
Drops Karisma - Old Rose, King Cole Pricewise - Vintage Rose
King Cole Majestic - Petunia, Sirdar Hayfield Bonus - Mauve
Stylecraft Special - Touch of silver, James C Brett Baby - Soft Grey
Jarol Heritage - Denim, Stylecraft Special Denim
Drops Karisma - Sea Green Mix, Cygnet - Juniper
King Cole Merino blend - Bayleaf, King Cole Pricewise - Forest
King Cole Merino blend - Bronze Green, Stylecraft Special - Khaki
Stylecraft Special - Burgundy, Scheepjest Colour Crafter - Kampen
Scheepjes Colour Crafter - Deventer, Stylecraft Special - Emperor
Scheepjes Colour Crafter - Alphen, Stylecraft Special- Storm Blue
King Cole Pricewise - Silver, Scheepjes Colour Crafter -Sint Nikklaas
Scheepjes Colour Crafter - Wolvega, Stylecraft Special - Graphite
Stitch Terms
ch - chain
tr - treble crochet (US double crochet)
ss- slip stitch
Ok, on to the pattern.

Start by making a 3 round Granny Square
We are going to start at the bottom, left-hand corner with square number 1 and then make and join 48 more squares, using join as you go, in the number order they appear above. Start by making square number 1 which is a normal 3 round granny square. I like my squares to be dense and tight so there are no chains between clusters on the sides and only 2 chains at the corners. I turn the square over after each round to keep it square and prevent twisting.
Using Stylecraft Life Zing and a 4mm hook:
Round 1: 3ch, ss into 1st ch to form a loop and 3ch. 2tr into loop. *2ch, 3tr into loop.* Repeat from * to * twice more, 2ch, ss into 3rd ch of starting 3ch. Turn.
Round 2: 3ch, 2tr, 2ch, 3tr in same corner space. *3tr, 2ch, 3tr in next corner space.* Repeat from * to * twice more, ss into 3rd ch of starting 3ch. Turn.
Round 3: Ss into space, 3ch, 2tr into same space. *3tr, 2ch, 3tr in next corner space, 3tr into next space.* Repeat from * to * twice more.3tr, 2ch, 3tr in next corner space. ss into 3rdch of starting 3ch. Fasten off.
Next, add square 2 above square 1
You can click the pictures to make them bigger if you need to.


Make square 2 until you get to the first corner of round 3. Instead of chaining 2, just chain 1. You are going to replace the 2nd chain with a slip stitch into square 1.
Slip stitch into one corner of square 1. To do this, insert your hook from top to bottom, pull up a loop and pull through it through the loop on your hook.
3tr into the same corner space of square 2.
Slip stitch into the next space on square 1.
Repeat for the next two sets of 3 trebles. When you reach the next corner, slip stitch and then chain 1.
Now finish the square in the usual way. Every square you join above will be done in the same way.
Make and join square 3 in the same way as square 2. Every square you add to the right will be done like this.
Now add square 4.
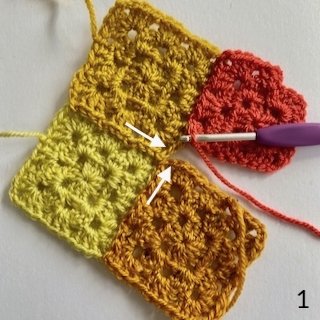


Begin joining square 4 in the same way as the previous two squares. When you reach the inside corner, make one slip stitch in each of the spaces indicated by the arrows. You are replacing both corner chains with a slip stitch.
Now join the second side and finish the square in the usual way.
At the intersection of the 4 squares, you should have a nice neat join.
Keep adding squares, until you have made your first block of 49 squares. Now it is just a matter of repeating that block as many times as you want to make the blanket the size you’d like, or until the yarn runs out 😁.
My blanket will have 9 repeats and I will be adding them in the order laid out in the diagram below. Just to be clear, these are not separate blocks. Each individual square is joined to the first block, one by one.
As you add more repeats, you should see the check pattern beginning to emerge with bands of light and dark running through it.

Layout
The 49 squares in the block above represent 1 repeat of the pattern. My finished blanket will, eventually, have 9 repeats laid out as in the diagram.
I haven’t decided what type of border I will use yet, but I think it will probably be something very simple.
I’ll update you with more pictures soon!