Vintage Hexies - Part 1

EDIT: This pattern is now available to buy as an ad free downloadable PDF. All 3 parts of the pattern will remain available for free here on my website.
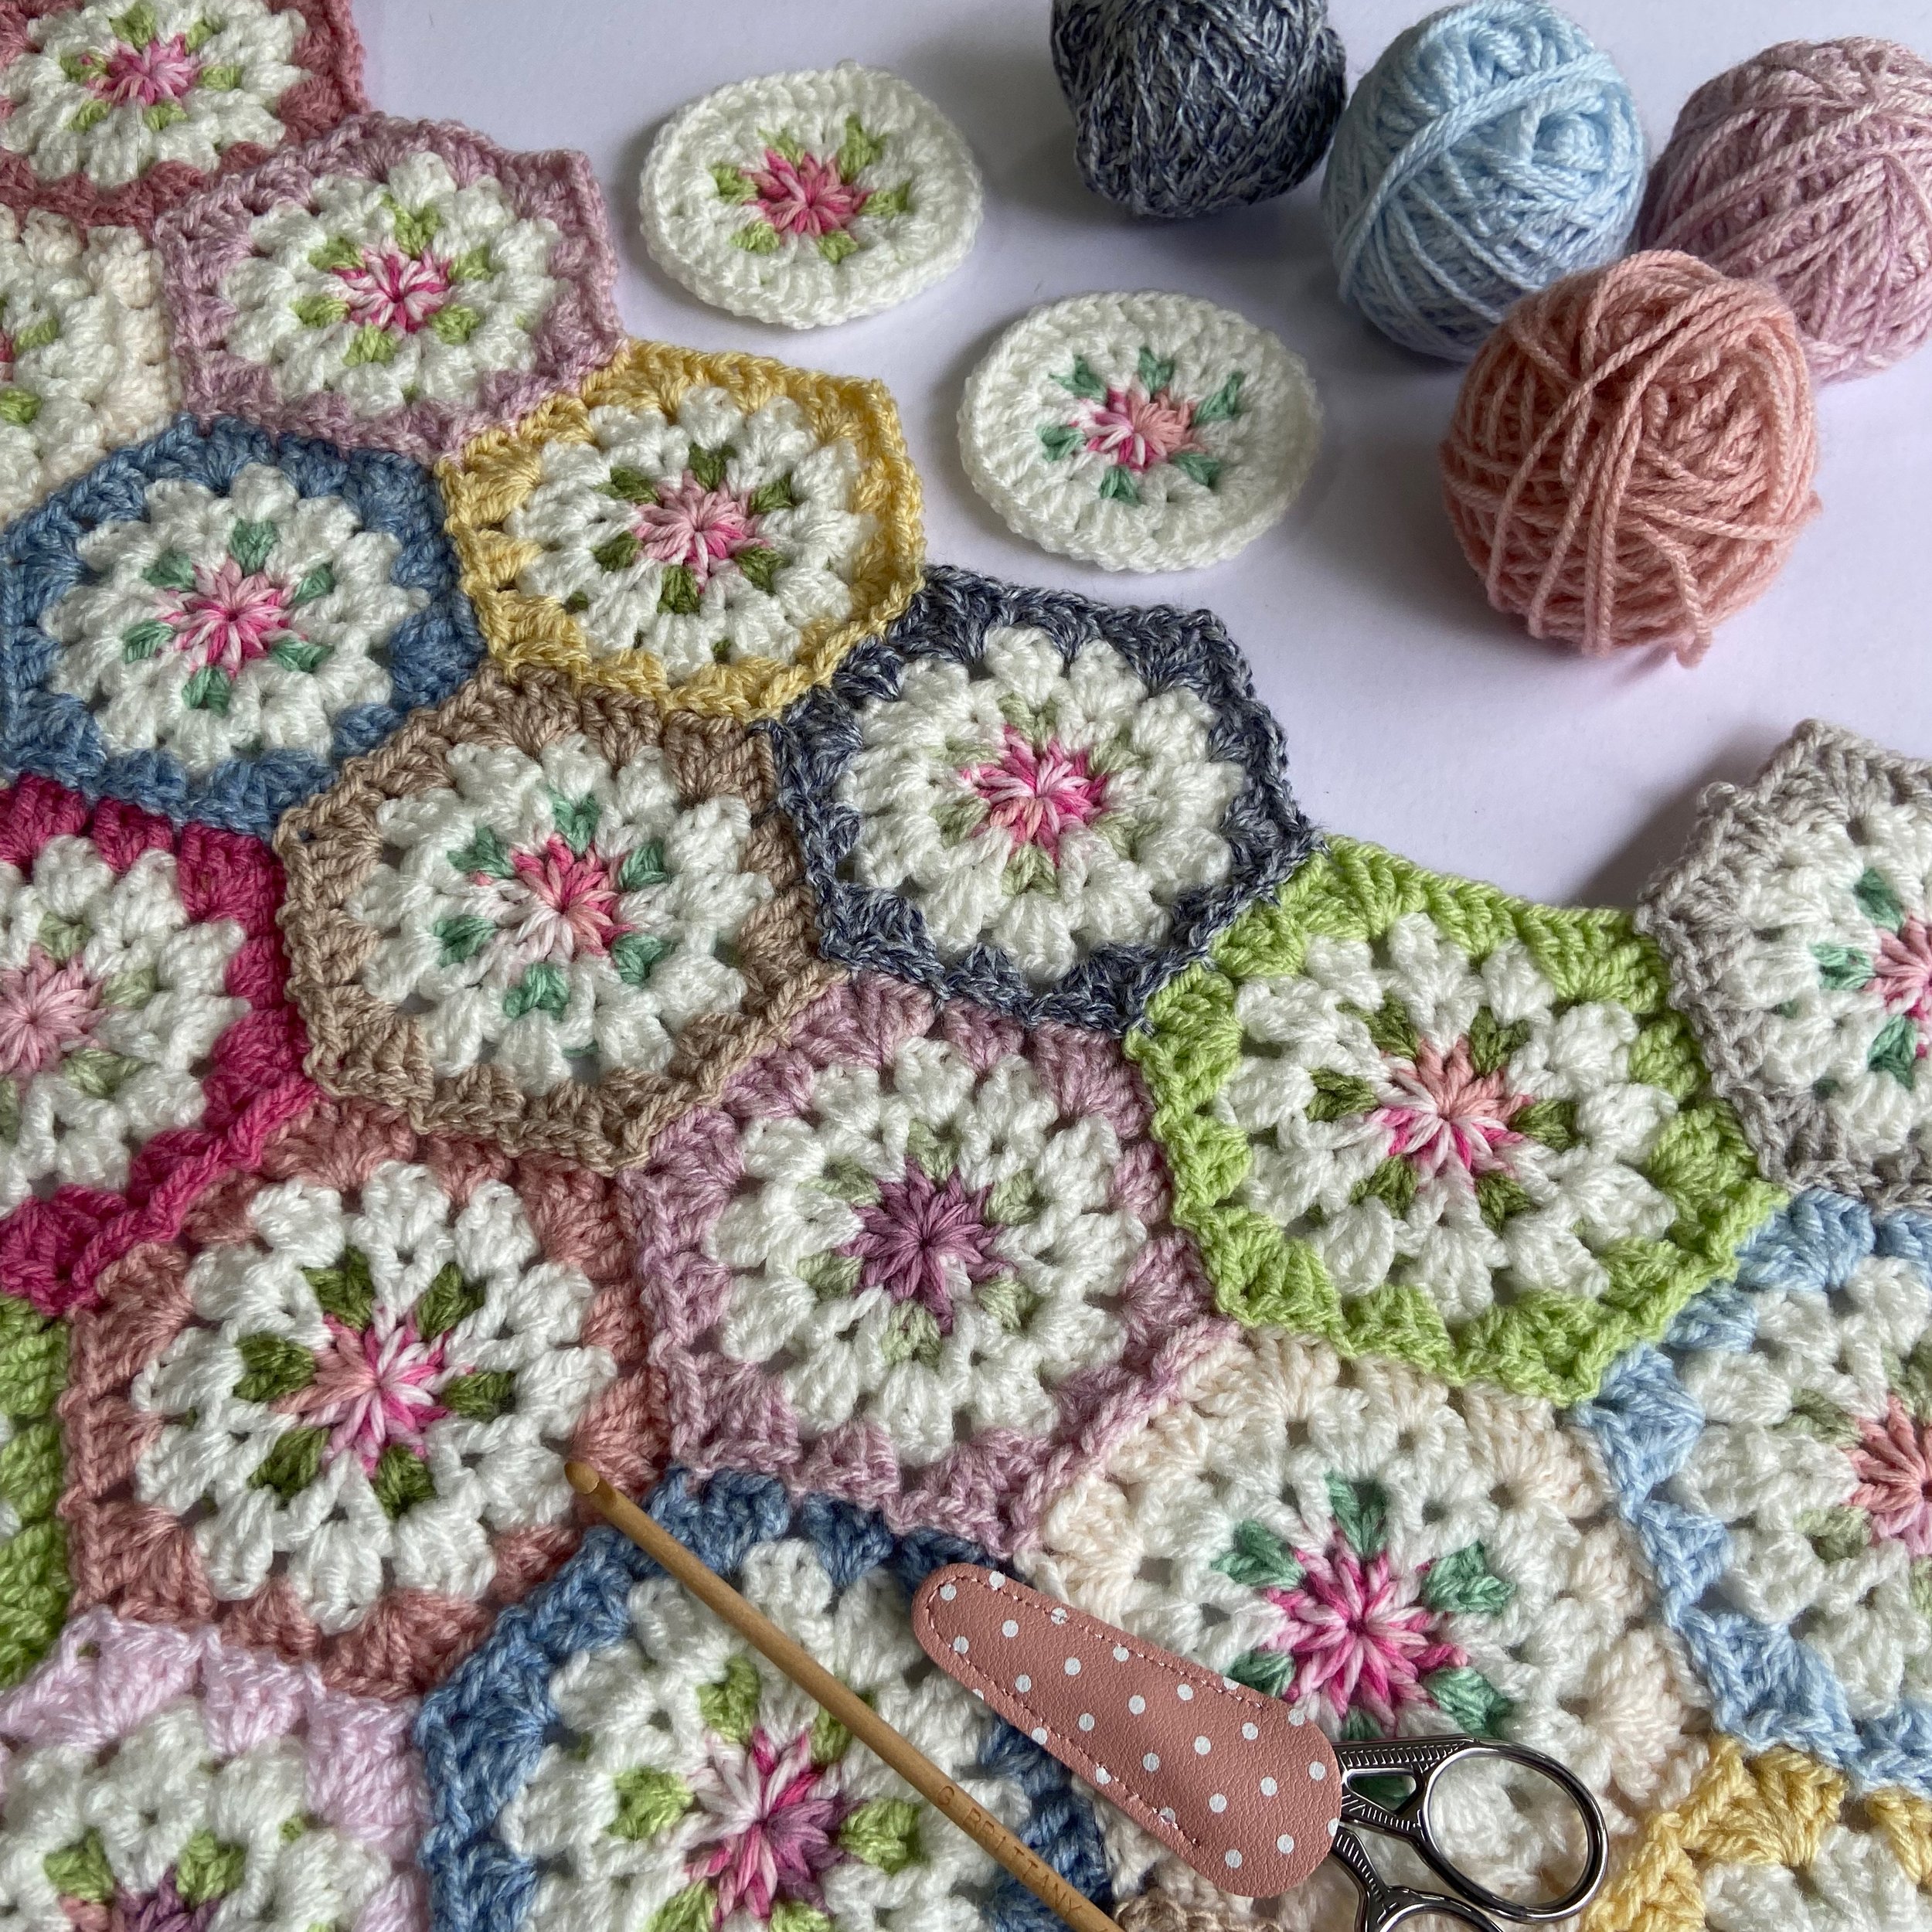
This pattern is a real dip into the archives for me. I first designed this little hexie back in 2014 and at the time I was obsessed with all things Cath Kidston. It’s a very long scroll down my Instagram page, but you can see the original version here.
My colour palette the first time around was very CK, but this time I’ve gone for a softer, more varied scheme. I’m using lots of bits and bobs of Sirdar Hayfield Bonus dk which comes in some wonderful vintage shades. I have no idea how big the blanket is going to be yet. I am just going to keep adding hexies until it ‘feels’ big enough, or the yarn runs out!
It’s a lovely, simple pattern to make, perfect for summer relaxation. Thanks to Join-as-you-go, absolutely no sewing is required.
If you would like to have a go at making some vintage hexies, here is what you will need:
Yarn

Variegated yarn for the centres. I used Sirdar Baby Crofter in Bonnie. Stylecraft Batik or Stylecraft Special dk in Carnation would be good alternatives. Plain yarns would work just as well though.
Green for the leaves. I’ve used Sirdar Harfield Bonus dk in Apple, Lime, Moss and Gentle Jade for some variety.
Cream.
Any colours you like for the joining rounds. I have used (so far) Sirdar Hayfield bonus dk in Oyster Pink, Deep Rose, Pink Peaches, Claret, Vanilla, Silver Mist, Frost Blue, Sky Mark, Denim Marl, Oatmeal, Pearl Grey, Tea Rose and Mauve Marl.


daryl-and-james:tool#crochet-studioSnufflebean yarn has Sirdar Hayfield Bonus yarn packs in her shop. Click here to go straight there.
You will also need
4mm hook or hook appropriate for the weight of yarn you are using
Scissors
Yarn needle.
Terms/ abbreviations
ch - chain
ss - slip stitch
tr - treble crochet (US double crochet)
sk - skip
UPDATE - Hooked By Robin has made a fantastic Tutorial Video! I hope this will help if you are having any problems with the tutorial. You can find it after the tutorial.
You can click on the images to make them bigger if you need to.


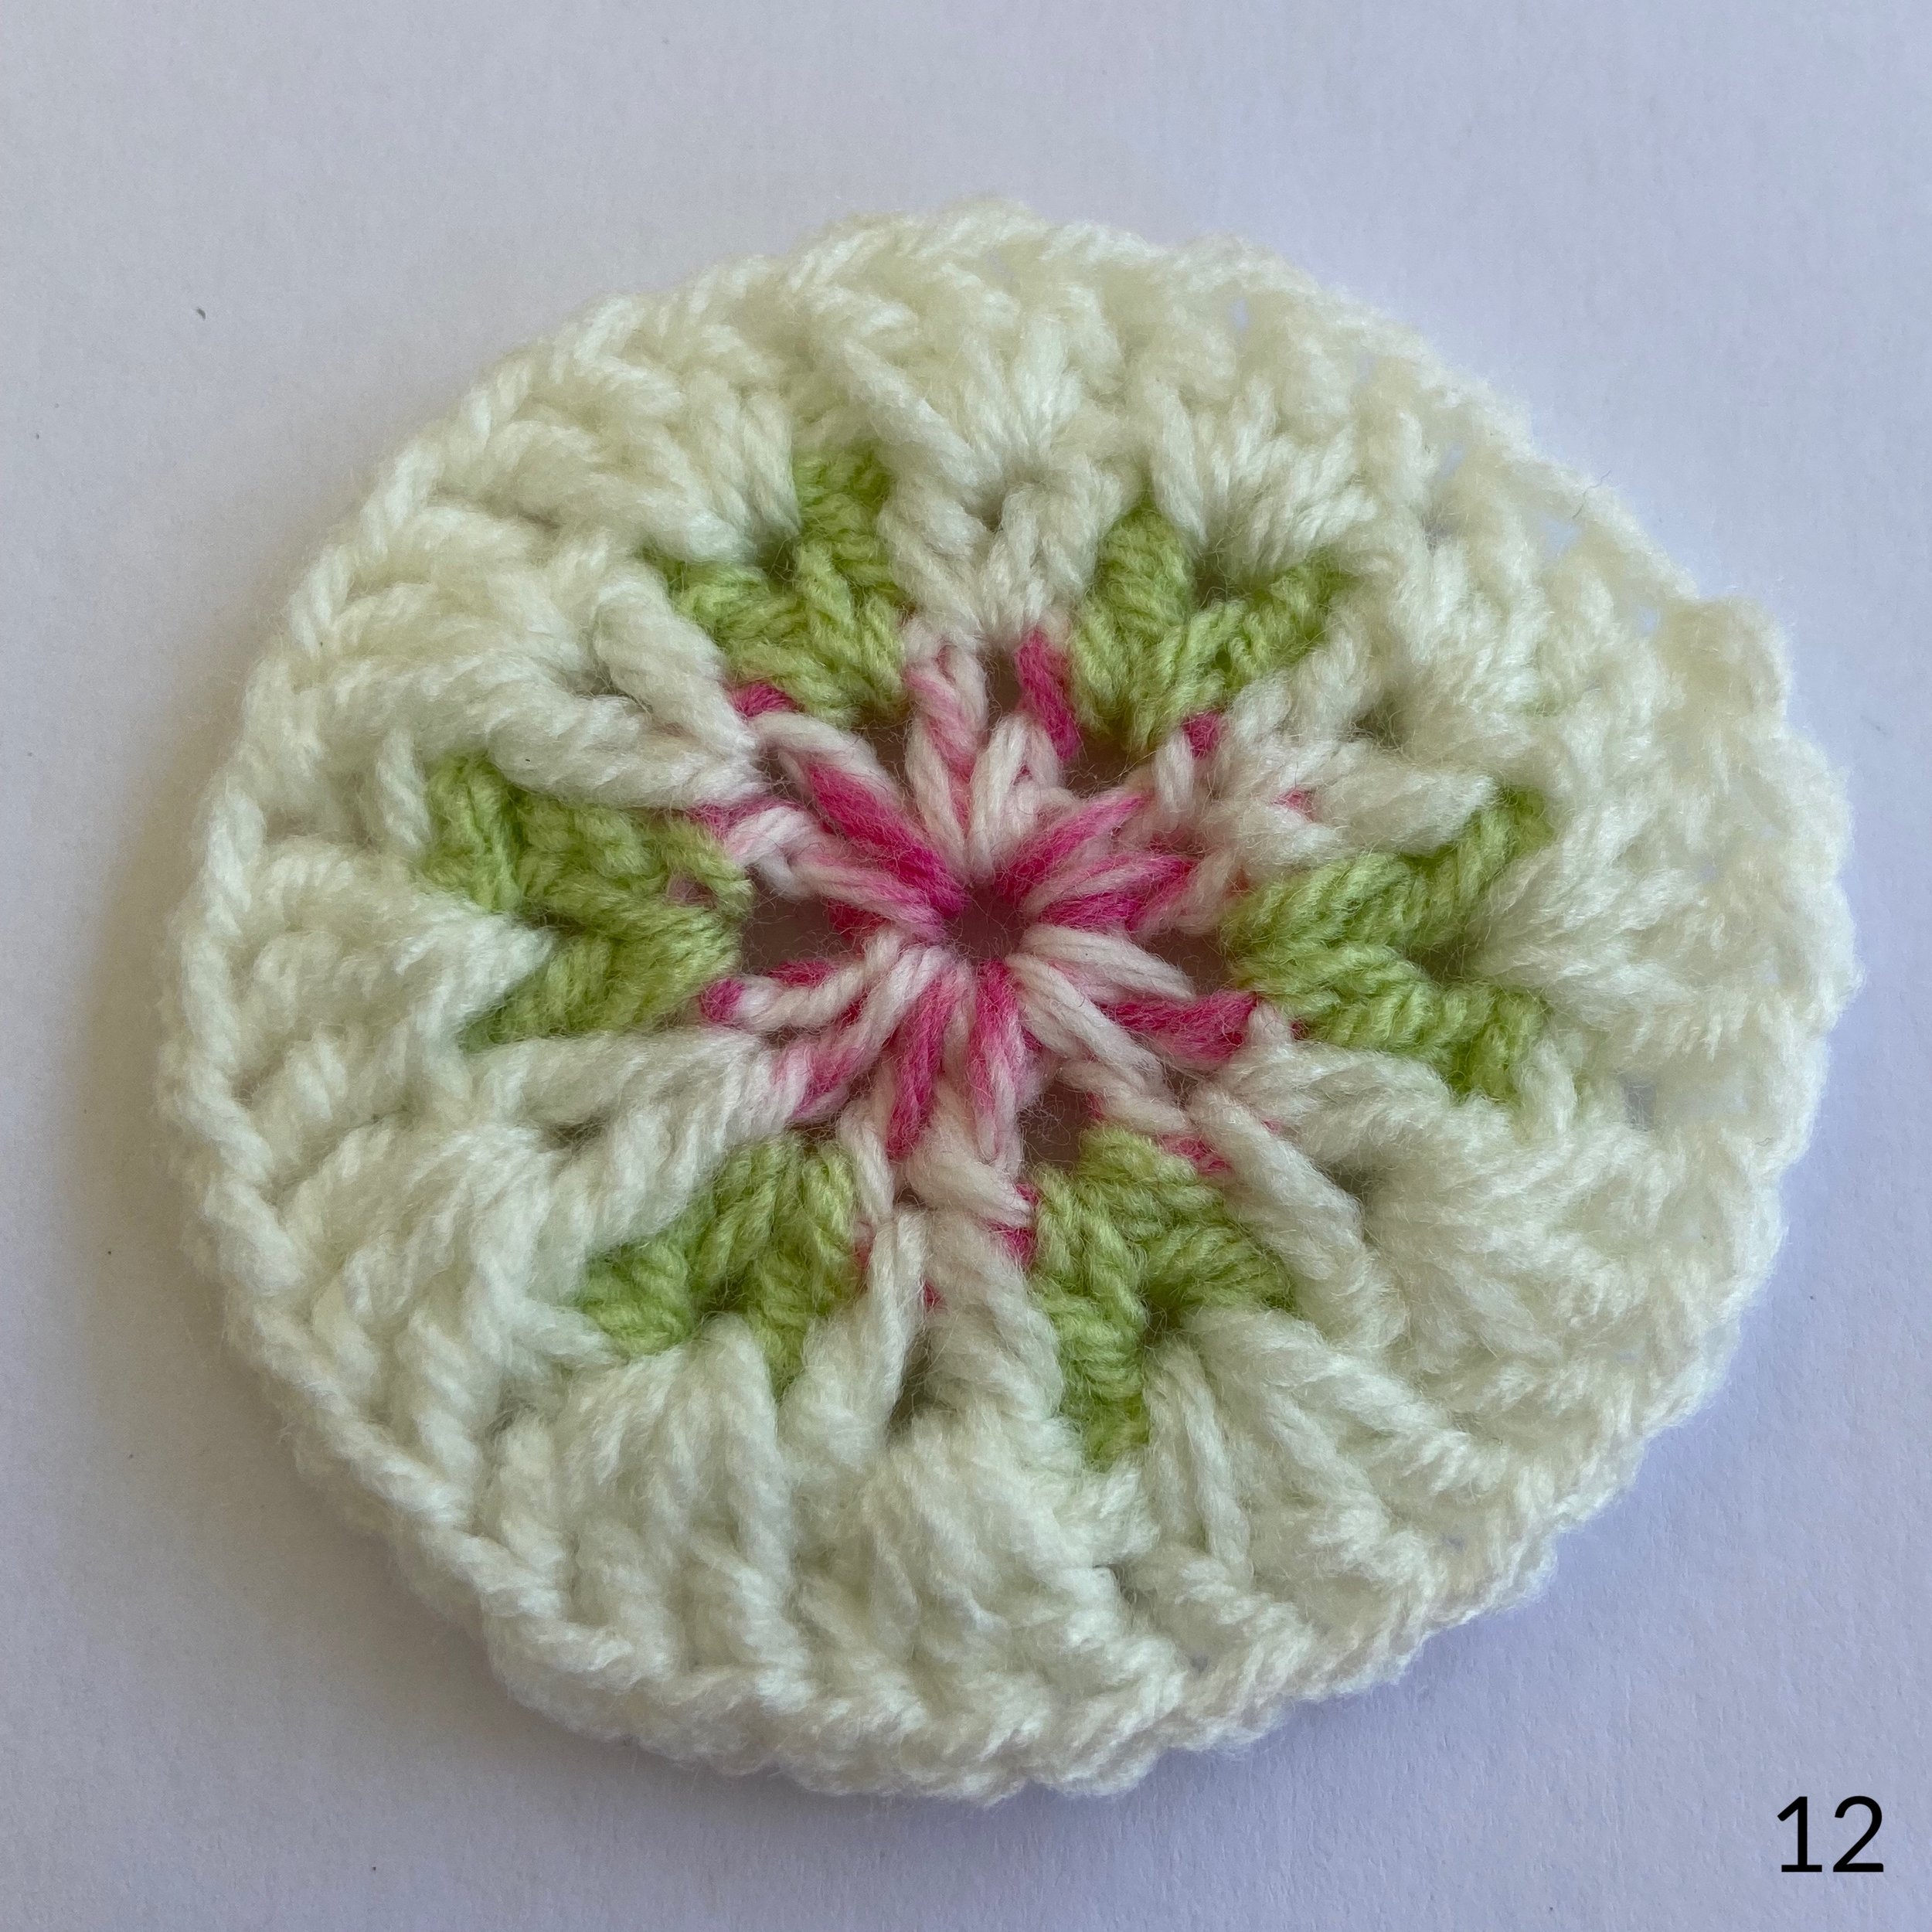
1. Round 1 - 3ch and ss to form a loop. 3ch (counts as first treble). 11tr into loop. Ss into 3rd ch of starting 3ch and fasten off. (12 tr including the starting 3ch).
It will really help to sew in the centre tails before you begin round 2 so they don’t get in the way.
2. Round 2 - Join green in any space BETWEEN pink tr.
I join with a slipknot, but join the yarn in the way most comfortable for you.
3. 3ch.
4. Tr in the same space and 2ch. * Sk 2 tr then 2tr in the space between pink tr * Repeat from * to * 4 more times. 2ch and ss into 3rd chain of starting 3ch. Fasten off.
5. Join cream in any empty space BETWEEN pink tr and 3ch.
6. Tr in the same space.
In picture 6 you can see that the cream is in front of the green and not worked over the top of it.


7 & 8. * 1ss into the top of each of the 2 green trebles then 2tr into the next space between pink tr * Repeat from * to * 5 more times then 1ss into the top of the last 2 green trebles.
9 & 10. Ss into the space between first 2 cream trebles, indicated by the arrow in picture 9.
This finishes the round and joins the cream and green together.
11. Round 3 - 3ch then 2tr in the same space.
12. 3tr in each space between 2tr. Ss into 3rd chain of starting 3ch and fasten off.
You should have 12 sets of 3tr and a perfect little circle.
13. Round 4 - Join your chosen colour in any space between 3tr. 3ch and 2tr in the same space. * In the next space 3tr, 2ch,3tr. In the next space 3tr. * Repeat from * to * 5 more times. In the last space, 3tr, 2ch,3tr. Ss into 3rd chain of starting 3ch and fasten off.
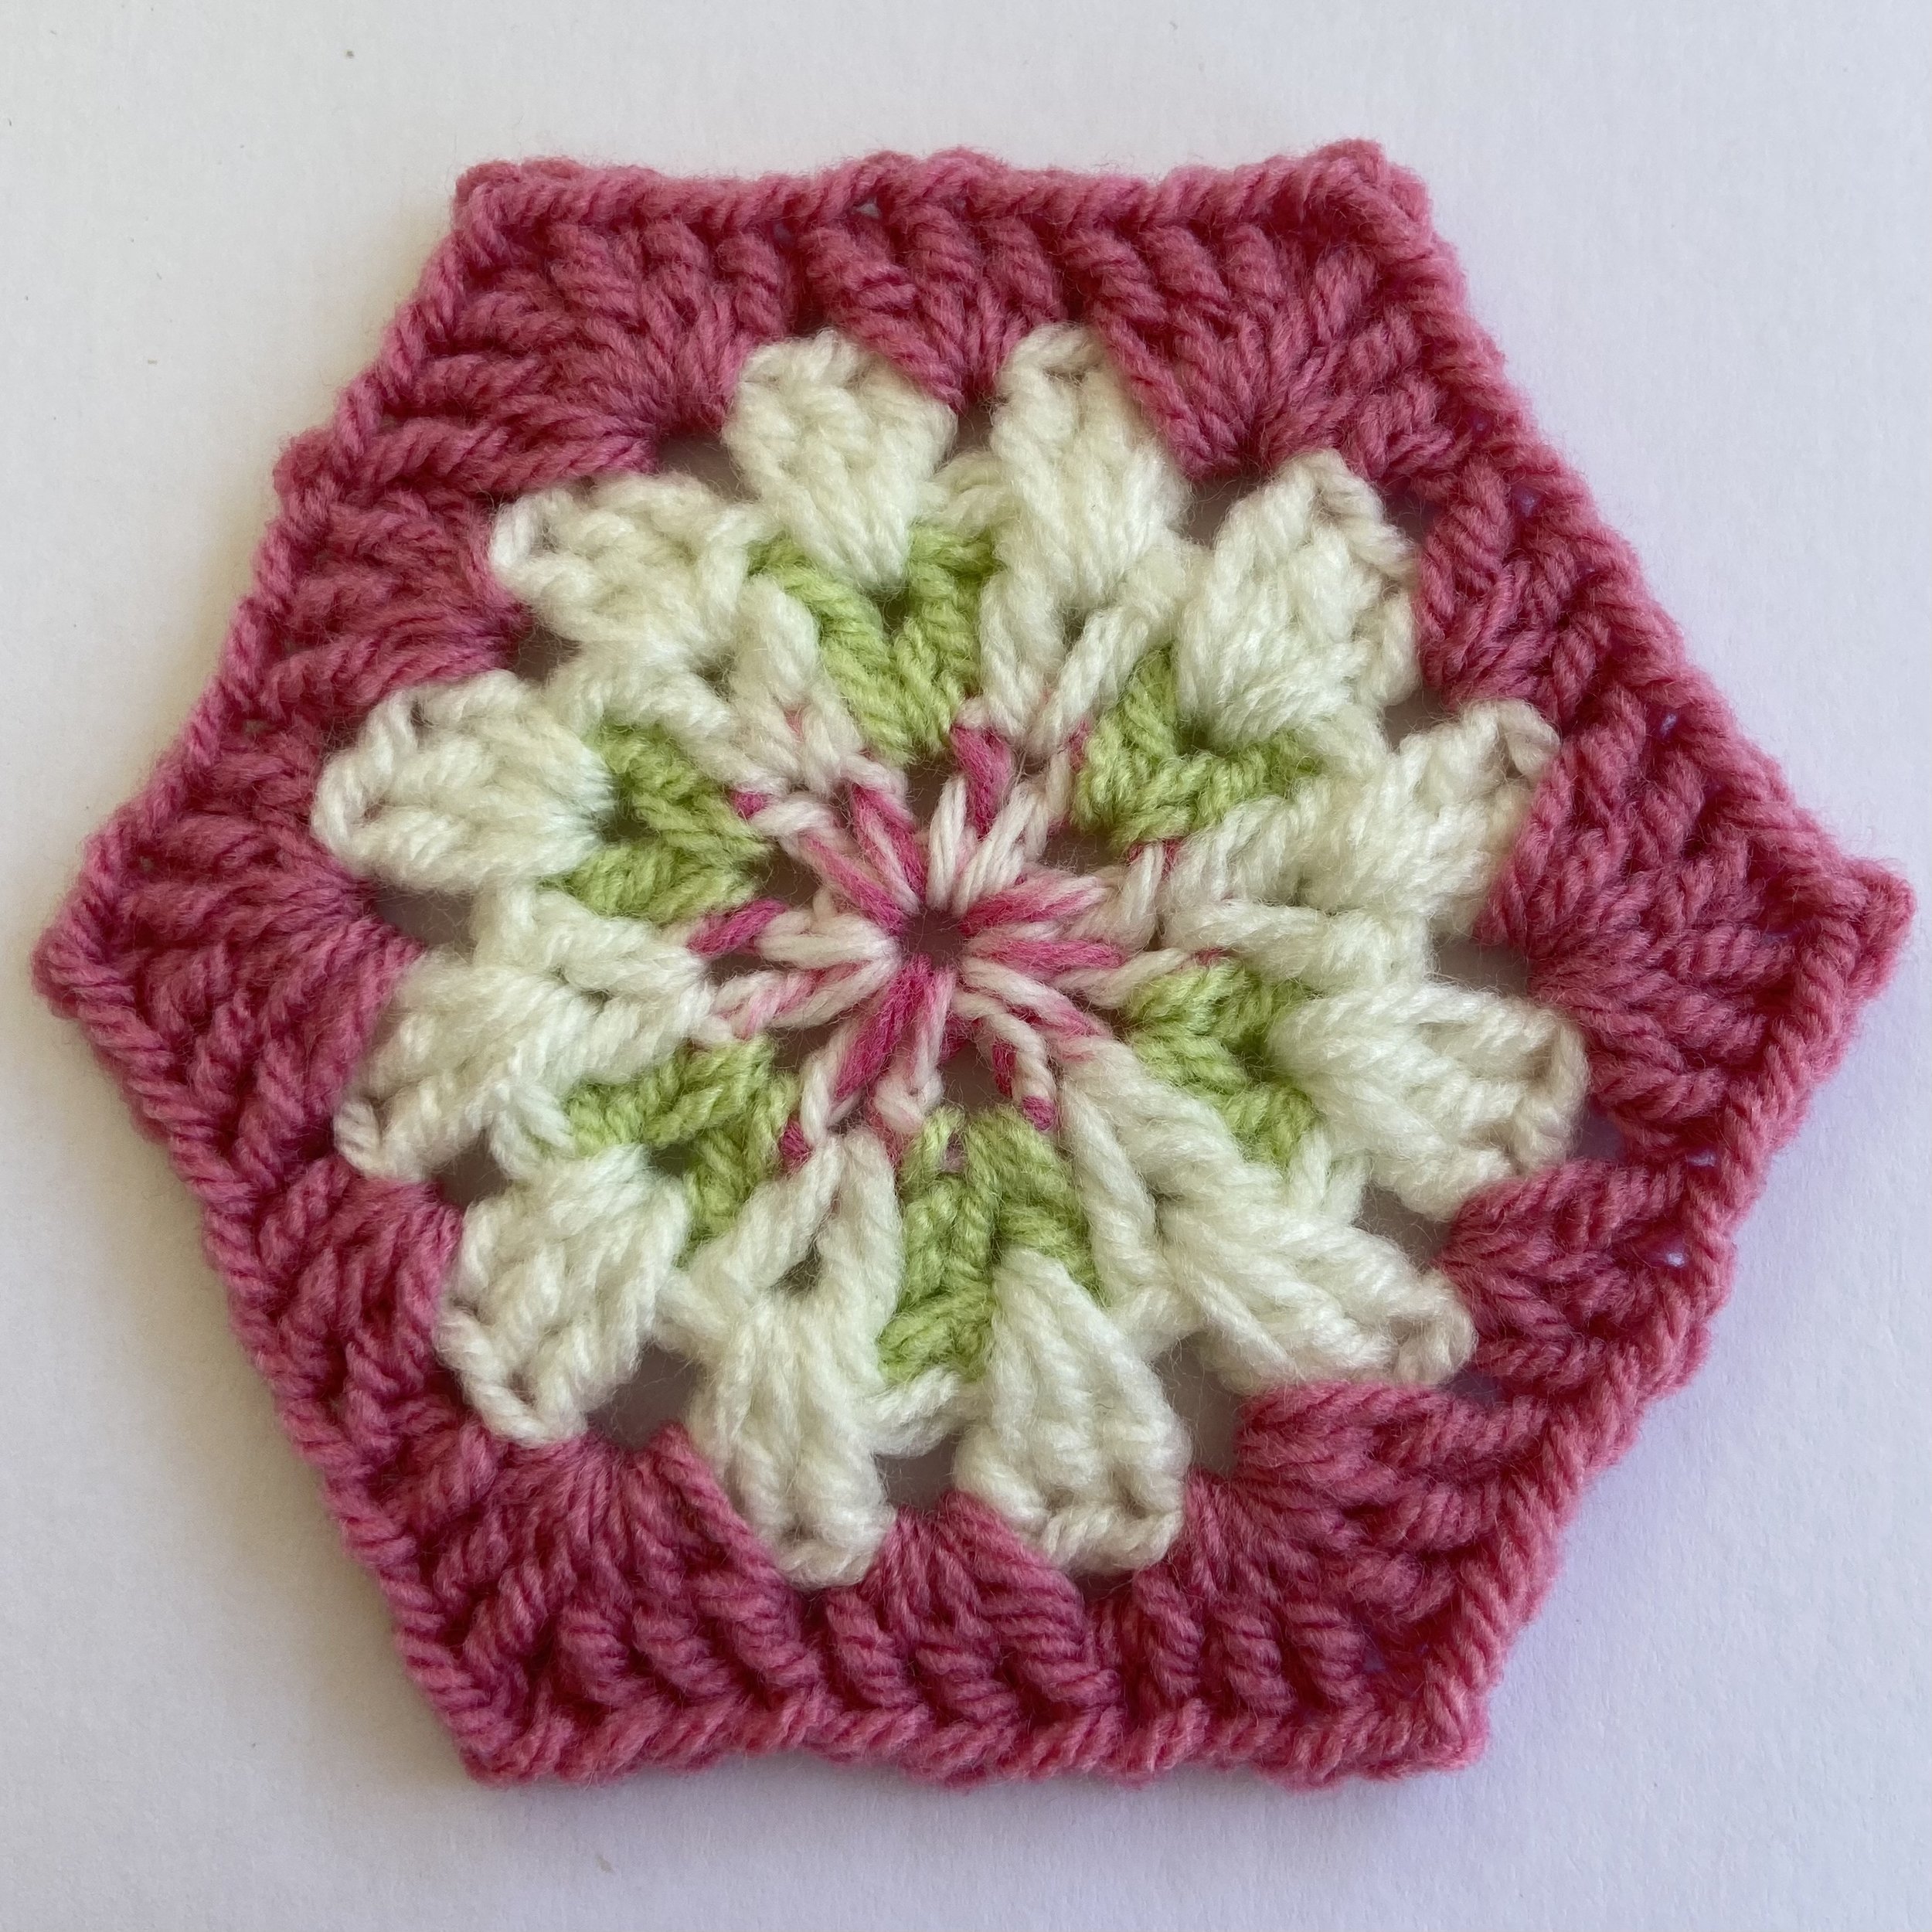
Ta Daa! That’s your first hexie complete.
It’s up to you what you do next. You can either make a pile of hexies and then sew them together or crochet them together afterwards. Or, you can join them ‘as you go’ as I have. This is my favourite join and is very easy to do once you get the hang of it. Instructions are below, but if you want a more in-depth tutorial you can download my Grace Blanket pattern here.
Right. Let’s get joining!
We will be working these joining rounds in the same way as round 4, except we will be adding some slip stitch to join the sides of the hexies together and replacing some of the corner chains with slip stitches.


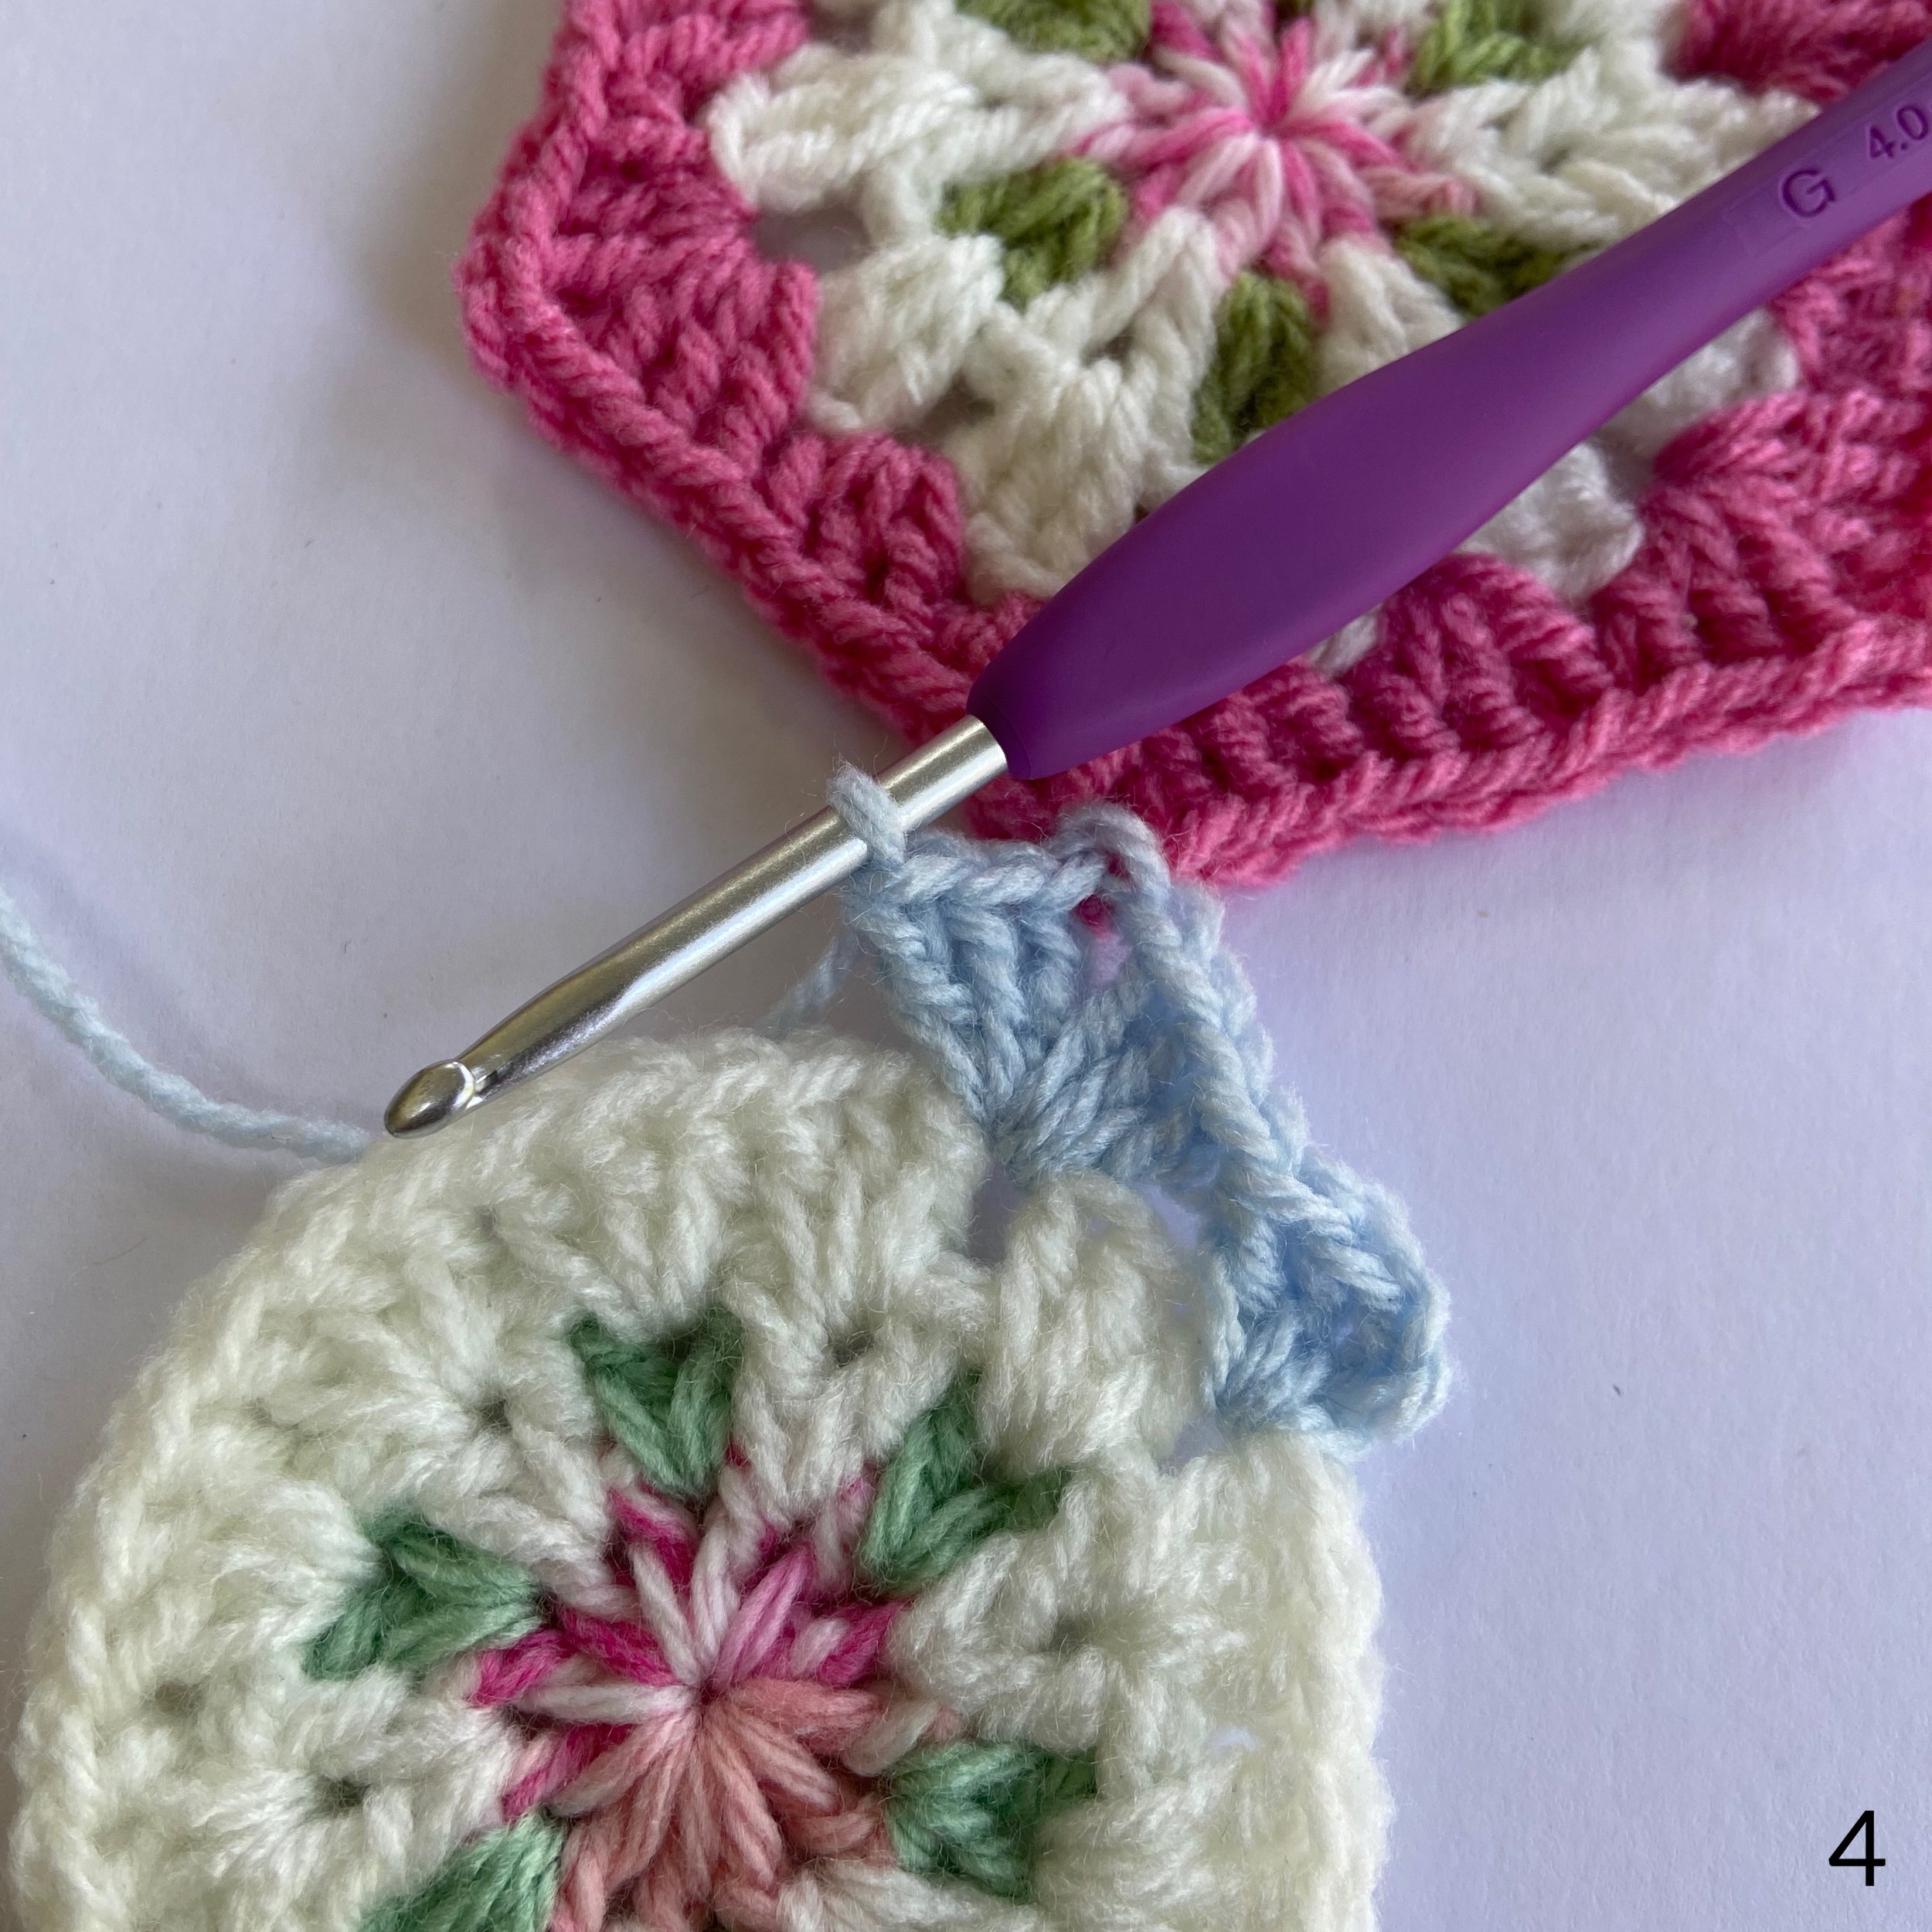


1. Join your chosen colour in any space between 3tr and 3ch. 2tr in the same space. 3tr in the next space and 1ch.
This chain is the first chain of a corner 2 chain. We are going to replace the second chain with a slip stitch.
2 & 3. Insert your hook from top to bottom in any 2ch corner space in the first hexie. Make a ss to join the two together.
4. 3tr into the same space to make the corner.
5 & 6. Ss into the next space on the first hexie to join. Repeat until you reach the next corner. After you have made a ss to join the corner, 1ch.
This chain is the second chain of the corner 2ch. Now finish the round in the same way as the first hexie you made.

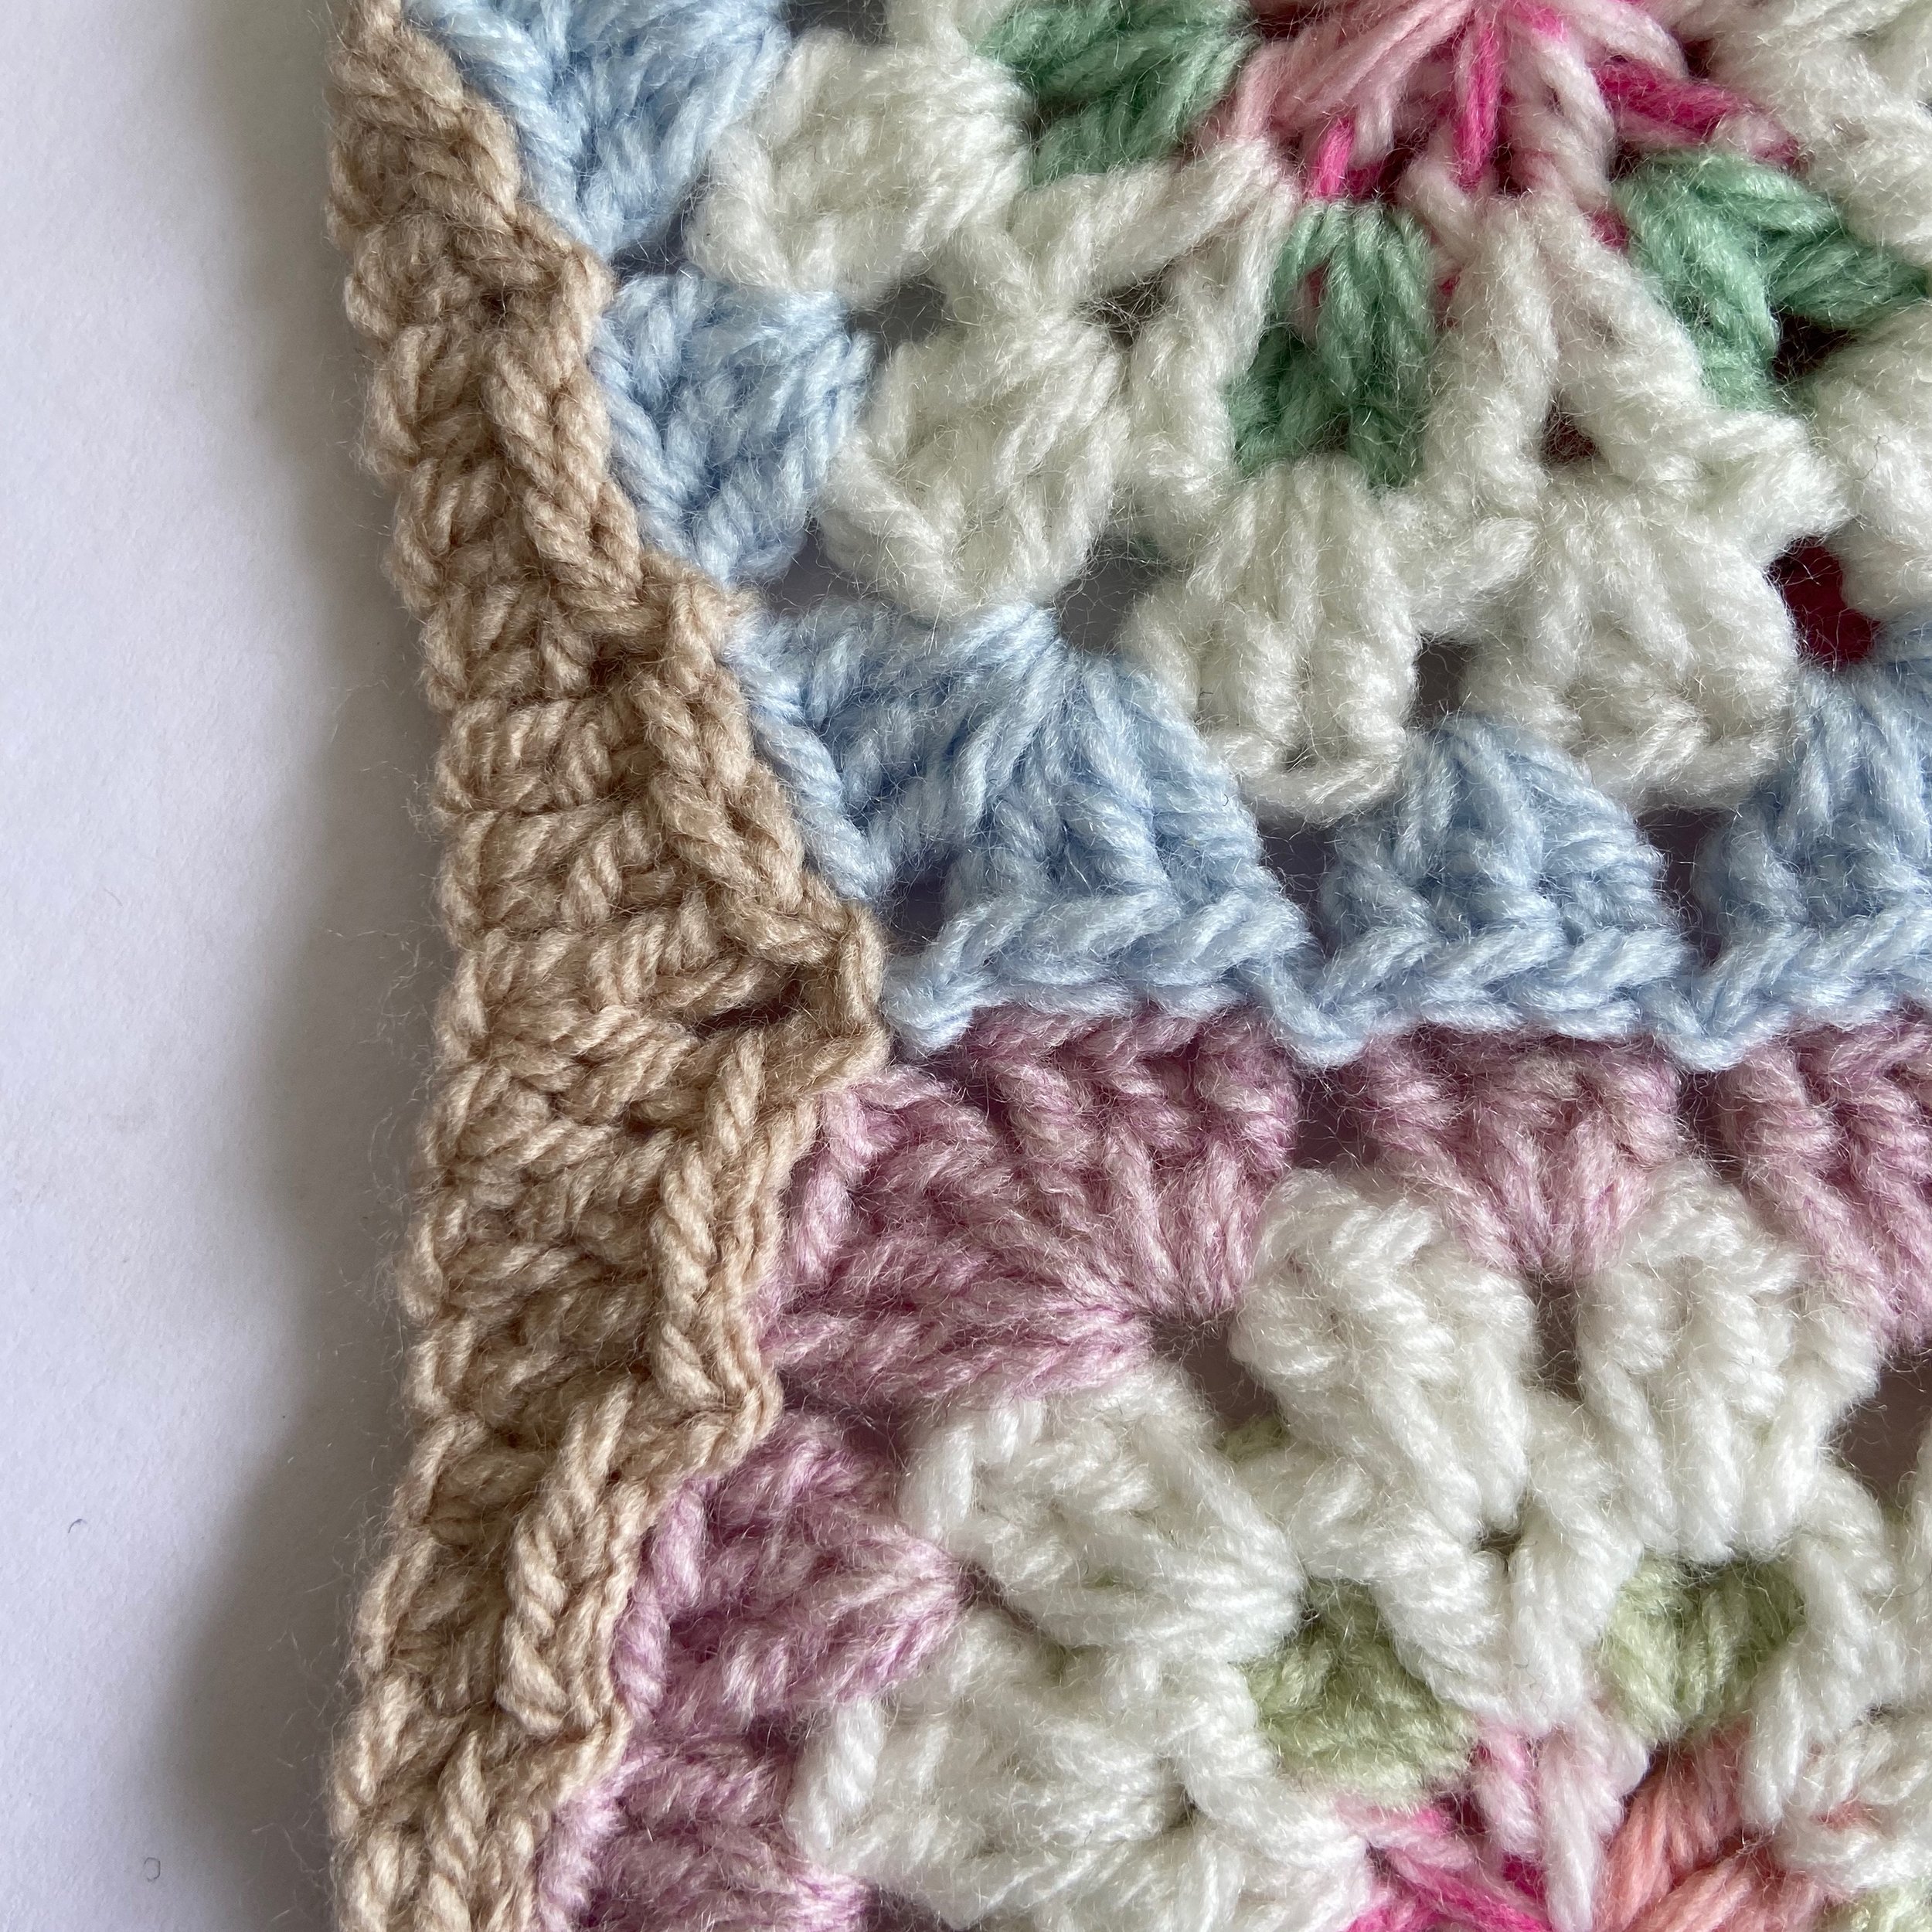
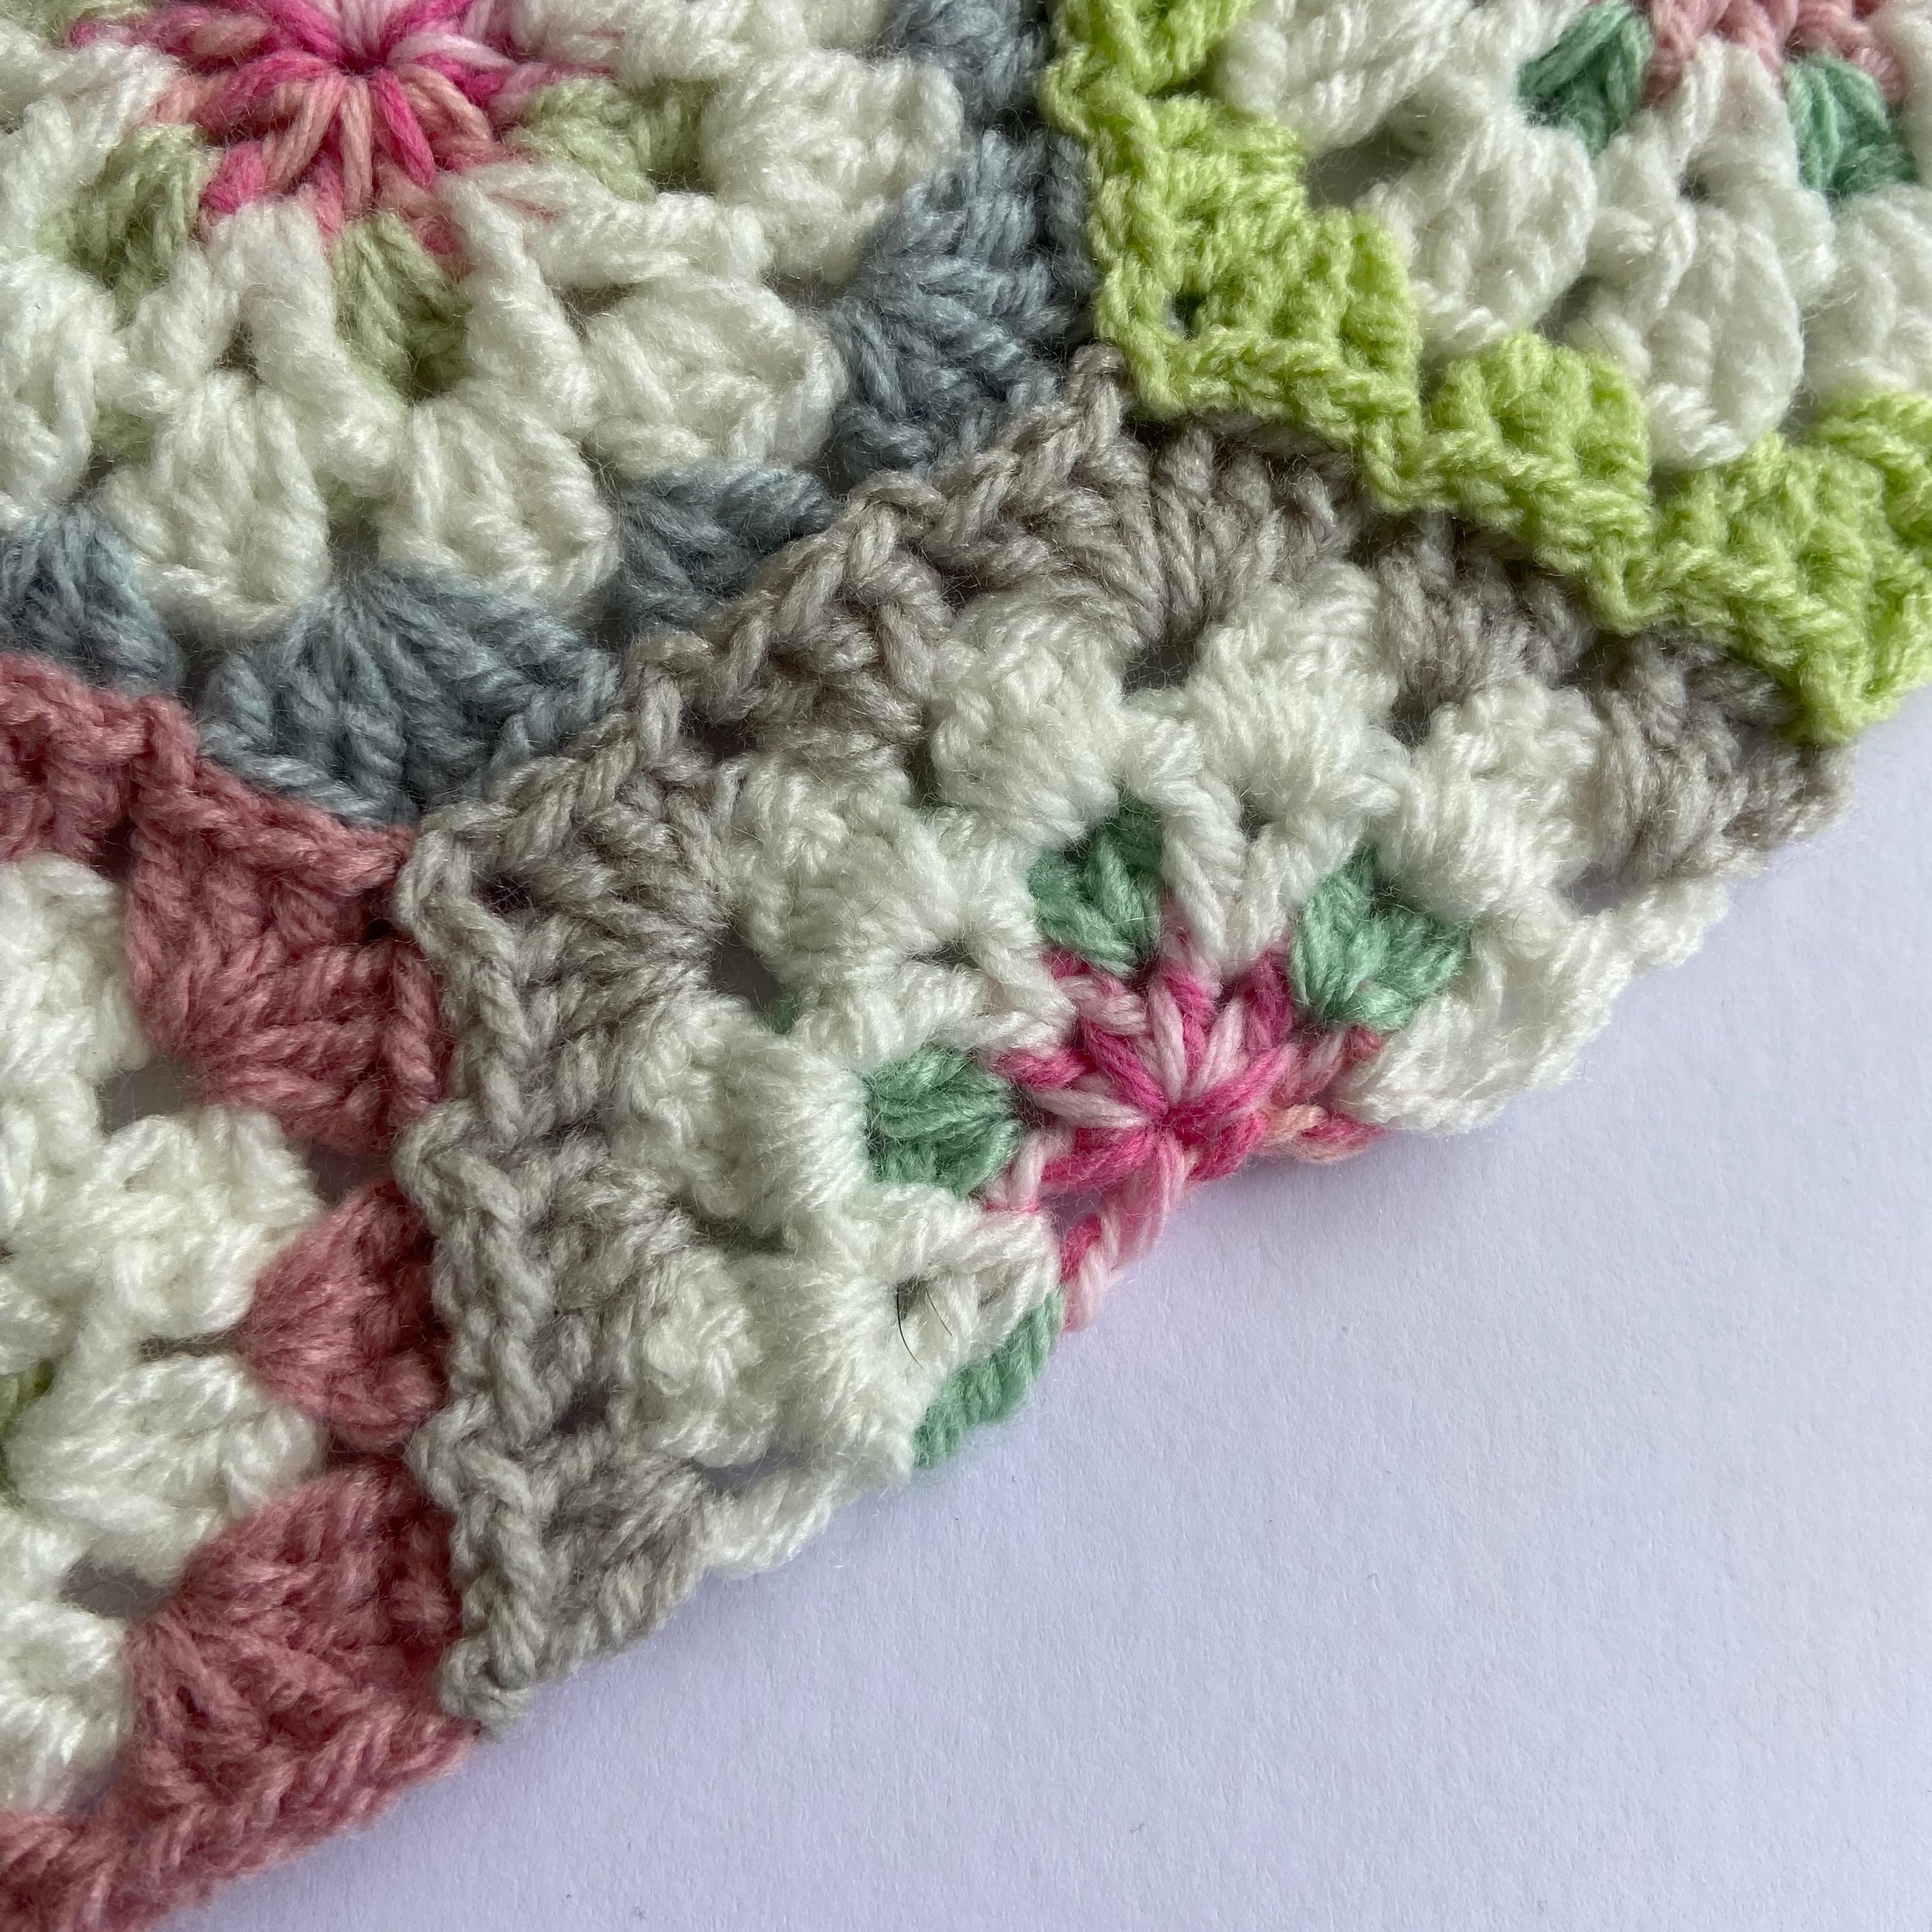
Your joined hexies should look like this.
Sometimes you will need to replace both corner chains with slip stitches. Here’s how to do it.


7. Start the joining round in the same way as before and begin joining in the right hand corner space of two joined hexies.
8 & 9. Join in the same way as before until you reach the inside corner where two hexies meet. This time you are going to replace BOTH corner chains with slip stitches. Make 1 ss in each corner space indicated by the arrows. Now continue joining and finish the round in the usual way.

You should have a lovely neat join where the corners meet. So satisfying!
Continue adding hexies until the blanket is the size you want. If you have any questions, please drop me an email and I will do my best to help.
UPDATE - Hooked By Robin has made a fantastic Tutorial Video! I hope this will help if you are having any problems with the tutorial.
Next week, in Part 2, I will show you how to add half hexies and fill in the side edges to make them straight.