
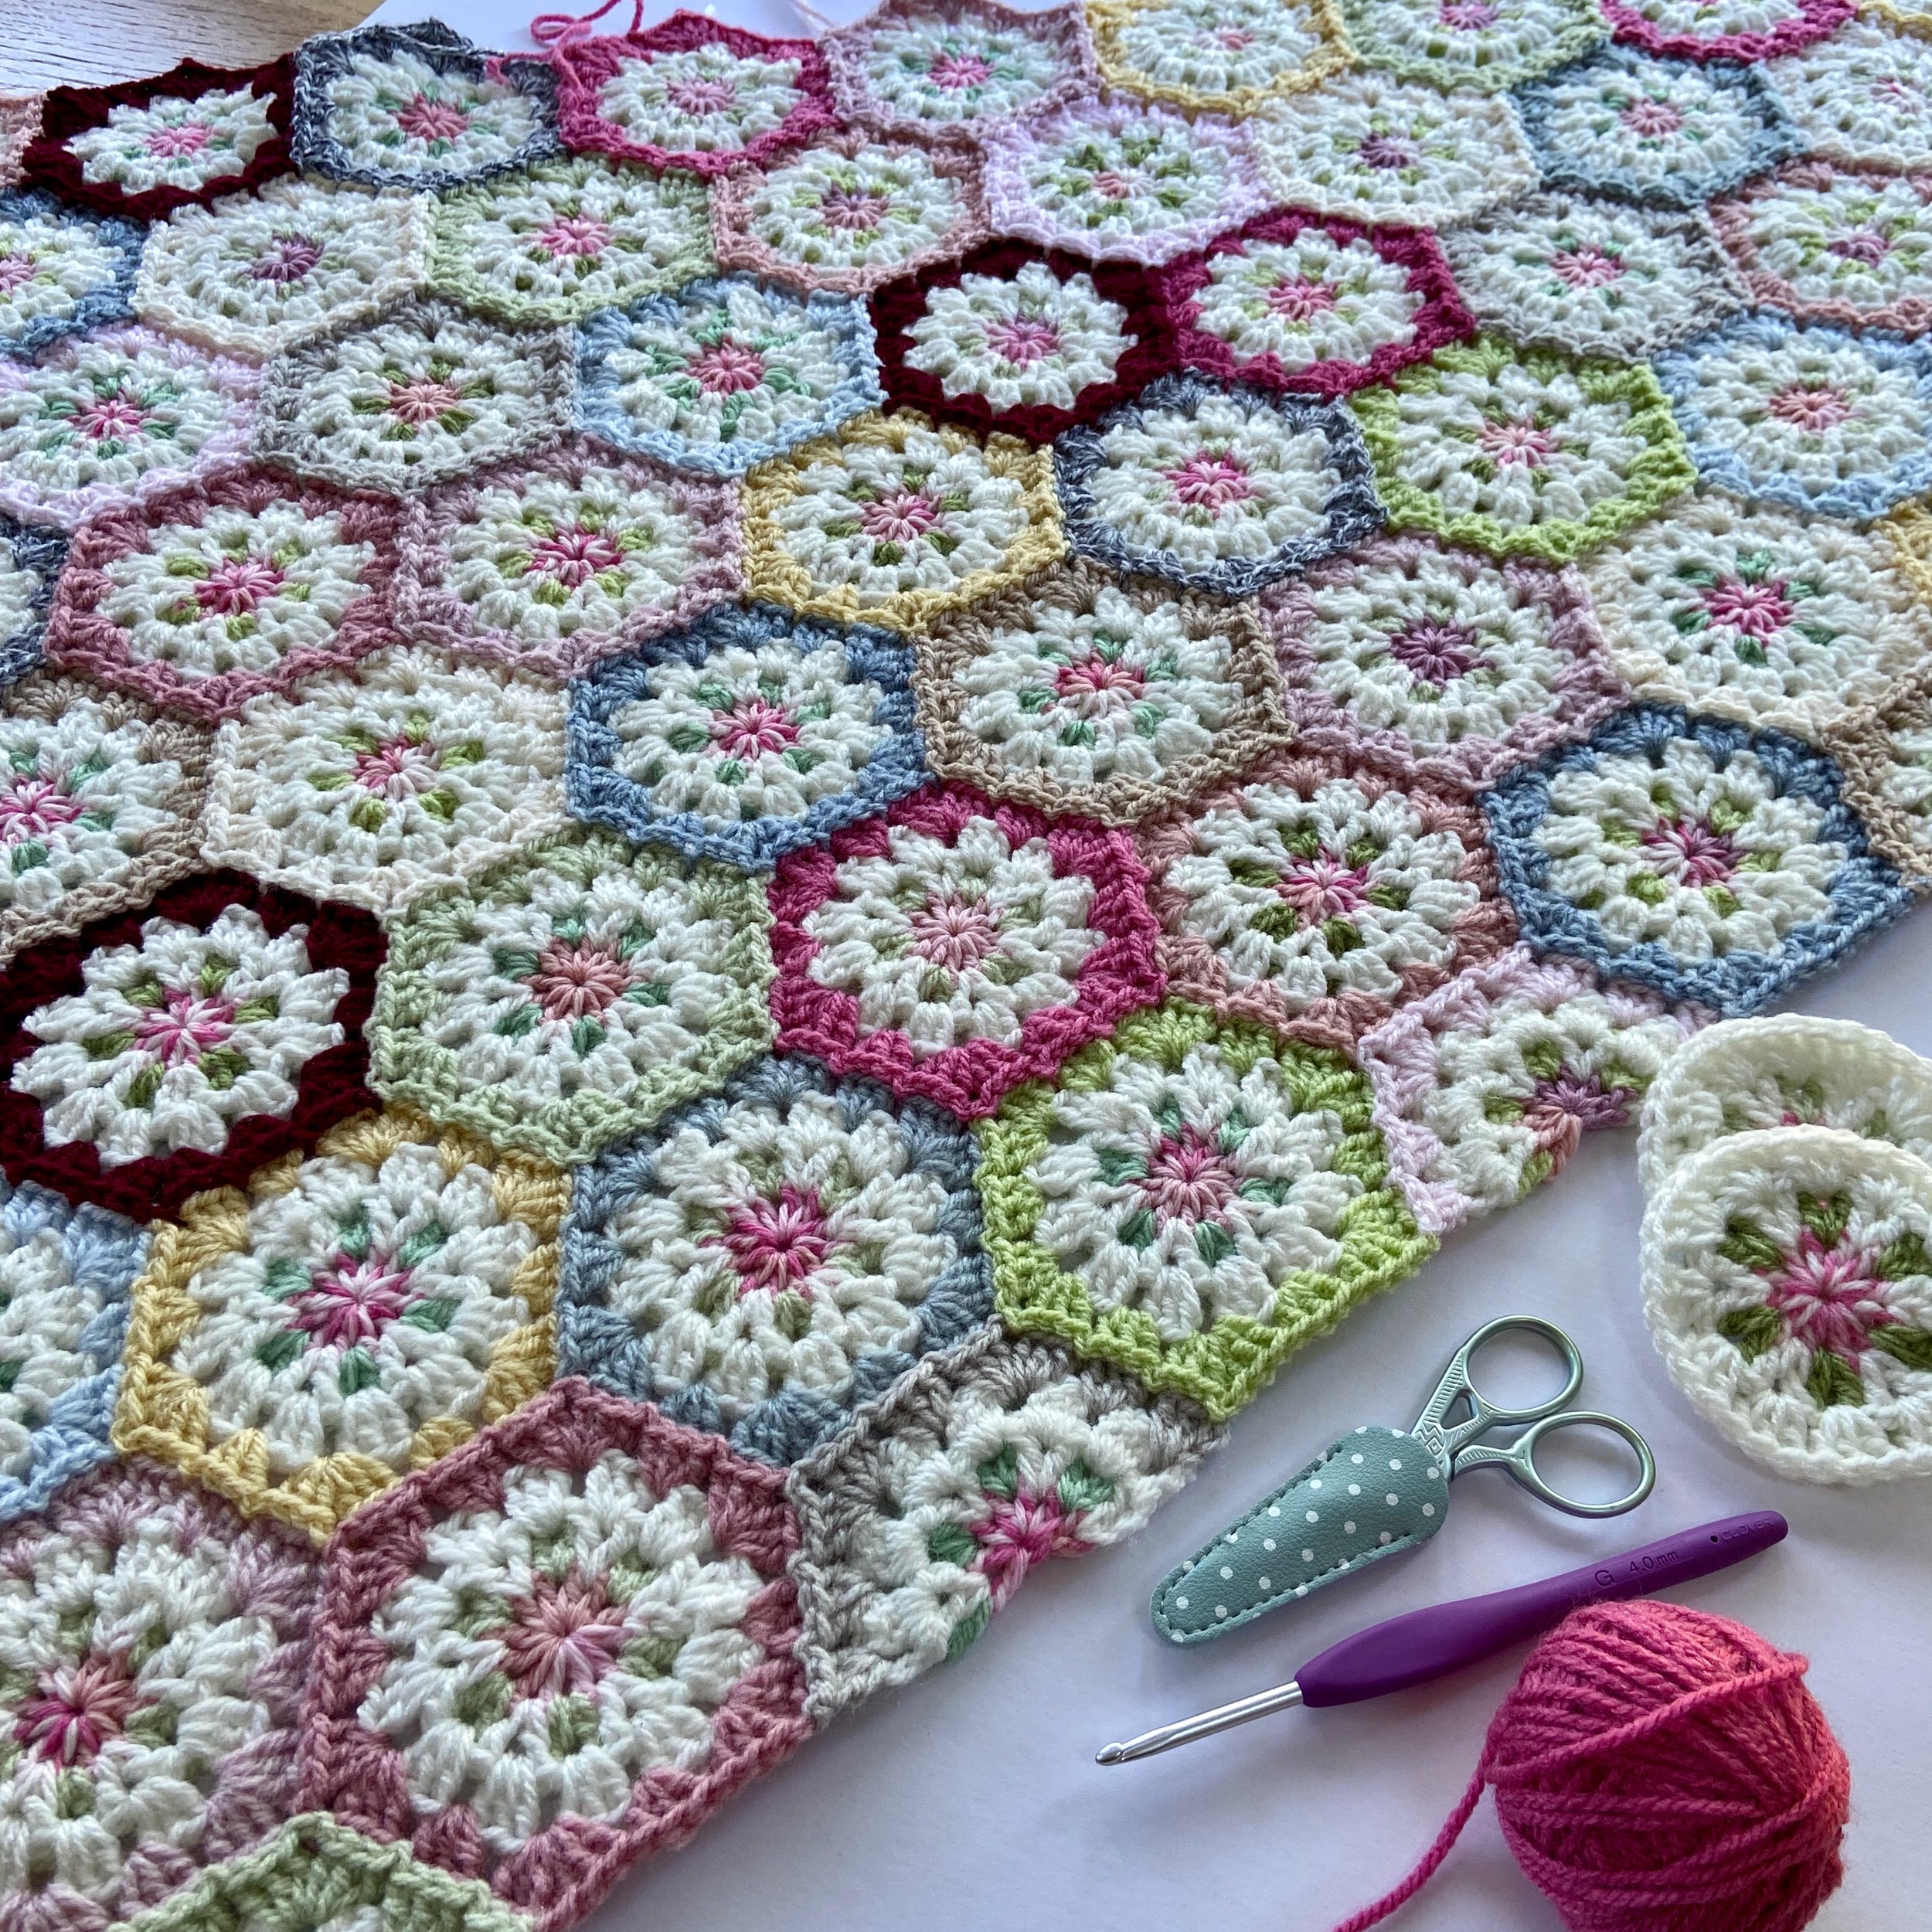
Vintage Hexies - Part 2
EDIT: This pattern is now available to buy as an ad free downloadable PDF. All 3 parts of the pattern will remain available for free here on my website.
In part 2 of the Vintage Hexies pattern, I will be showing you how to make half hexies and how to fill in the sides to make nice straight edges. This is completely optional but does make it much easier to add a border. If you haven’t seen part one of the pattern you can find it here. Part one has all the yarn, hook and stitch terminology details.
Ok, let’s fill in those edges.
Click the pictures to enlarge if you need to.


1 . Round 1: 3ch and ss to form a loop. 3ch (counts as first treble). 8tr into loop and fasten off. (9 tr including the starting 3ch).
2. Round 2: Join green in the space BETWEEN the 2nd and 3rd pink tr on the right-hand side of your centre and 3ch. Tr in the same space and 2ch. * Sk 2 tr then 2tr in the space between pink tr * Repeat from * to * 1 more time. 2ch and 1tr into the space between the last two pink tr. Fasten off.
3. Join cream in the space between the first and second tr on the right-hand side of your centre and 3ch.
4. * 1ss into the top of each of the 2 green trebles then 2tr into the next space between pink tr * Repeat from * to * 2 more times then ss into the top of the last green treble.
5. 3ch, turn. 3tr in the space between 2tr.
6. 3tr in each space between 2tr, ending with 1tr between last 2 green tr and 1 white tr. Fasten off. Turn.


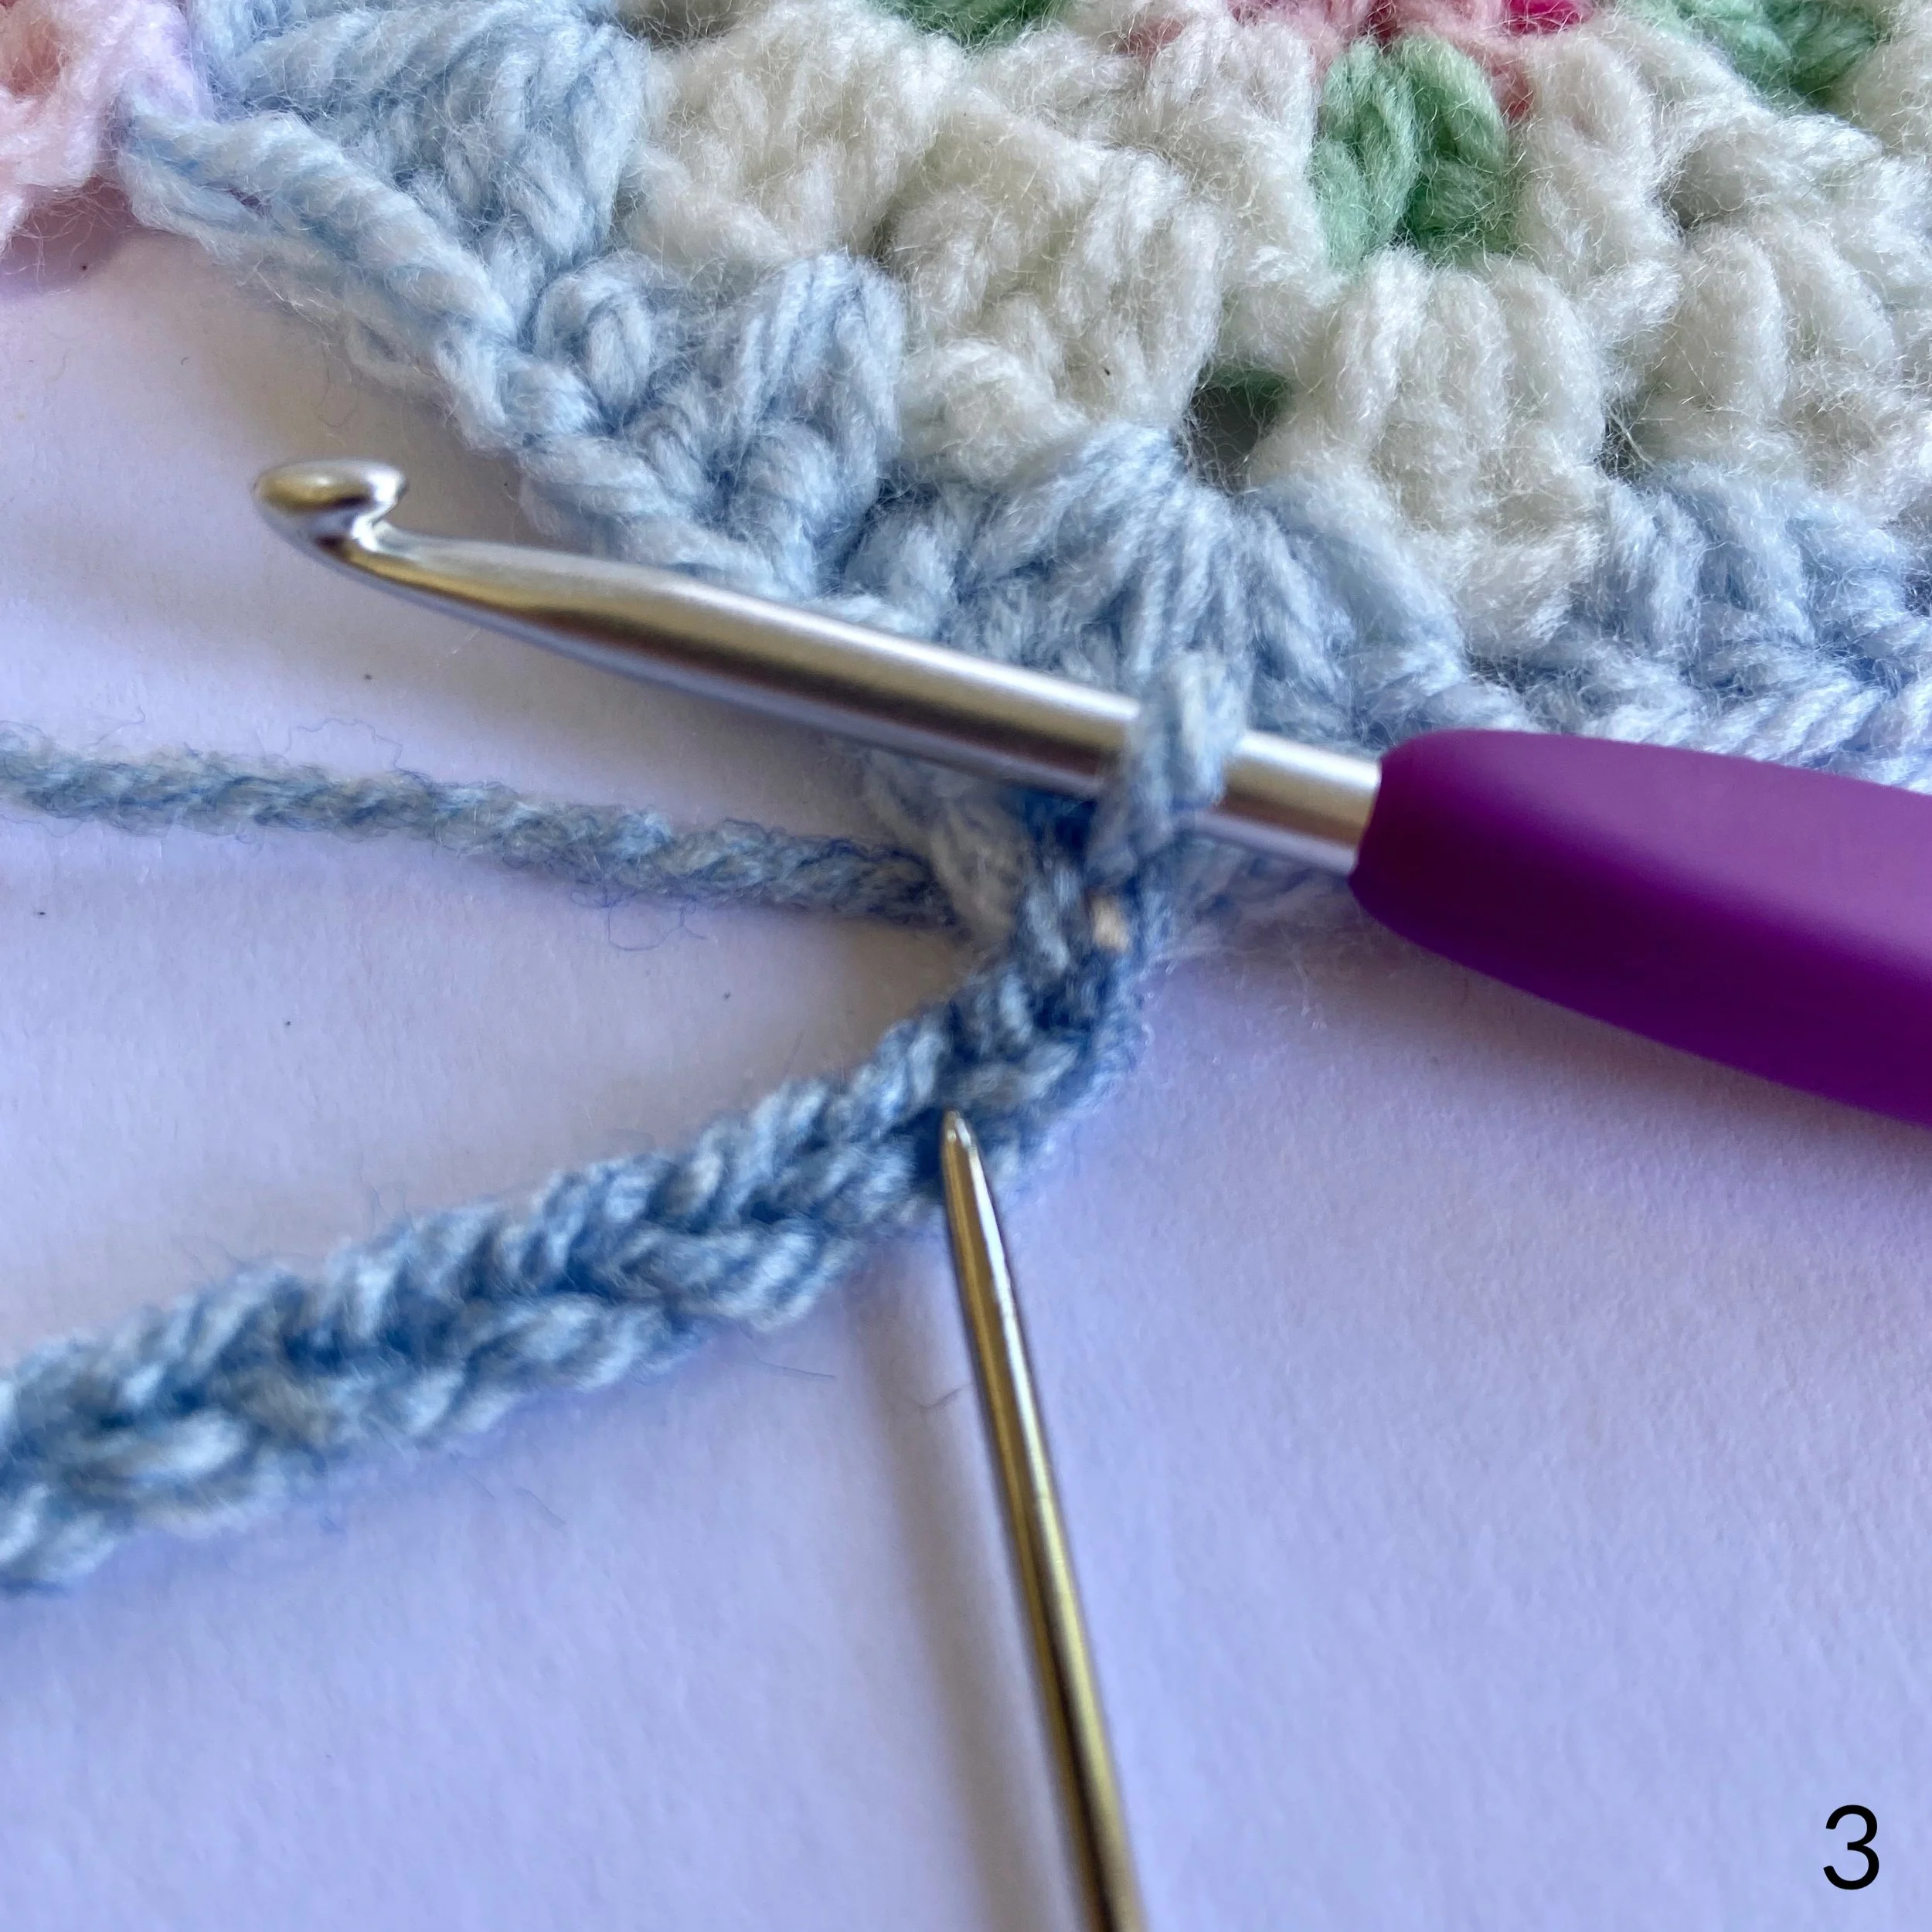
7. We are going to join the half hexie using join as you go. This works in exactly the same way as the full hexies in part 1.
8. Join your chosen yarn in the space between the single tr and the 3tr on the right-hand side of your centre. 2ch. (I find a 2ch works better here and gives a neater finish than the usual 3ch.)
9. Ss to join in the corner space of a full hexie.
10. 2tr into the same space. Now join the half hexie in the same way as you would join a full hexie.
11. When you have completed the last 3tr, ss into the corner space of the full hexie to join the other side. Fasten off.
12. There you have it! A lovely straight edge.
If you need some extra guidance, here is Hooked by Robin’s fantastic video.
Next, we are going to look at how to fill in the small triangular spaces on the edges. I tried a few different ways to fill them in but settled on this method as it fits best with the join-as-you-go hexagons.
For this part, we will be using the following additional stitches
htr - half treble crochet (US hdc - half double crochet)
dtr - Double treble crochet (US tr - treble crochet)
dc - Double crochet (US sc - single crochet)


1 . This is the edge we are going to be filling in
2. Ch18 and ss into the corner space of a full hexie.
3. 1dc into the chain indicated by the needle. Including the ss, this will be the 3rd chain from the hook.


From now on you will be working along the chain.
4. 1dc, 1htr.
5. Ss to join the full hexie.
6. 2htr, 1tr. Ss to join full hexie.
7. 2tr, 1dtr. 1ss into each of the two corner spaces to join to the full hexies.
8. 1dtr into the same chain as the previous dtr.
9. 2tr, Ss to join to full hexie. 1tr, 2htr, ss to join to full hexie. 1htr, 2dc, ss to join in corner space of full hexie. Fasten off.
In part 3, the final part, I will be adding a border to finish things off.
I will be updating my progress on Instagram @madebyanita. Please share your pictures with me if you are on Instagram too.