
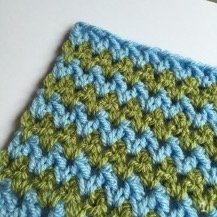
V-Stitch Blanket

V-stitch is a wonderfully versatile pattern. It’s suitable for absolutely anyone, neither too plain or too fussy. It can be made in any number of colours. Try a single colour for a classy bedroom throw or use up all your scraps for a snuggly fireside blanket. Best of all it’s super quick and easy to work.
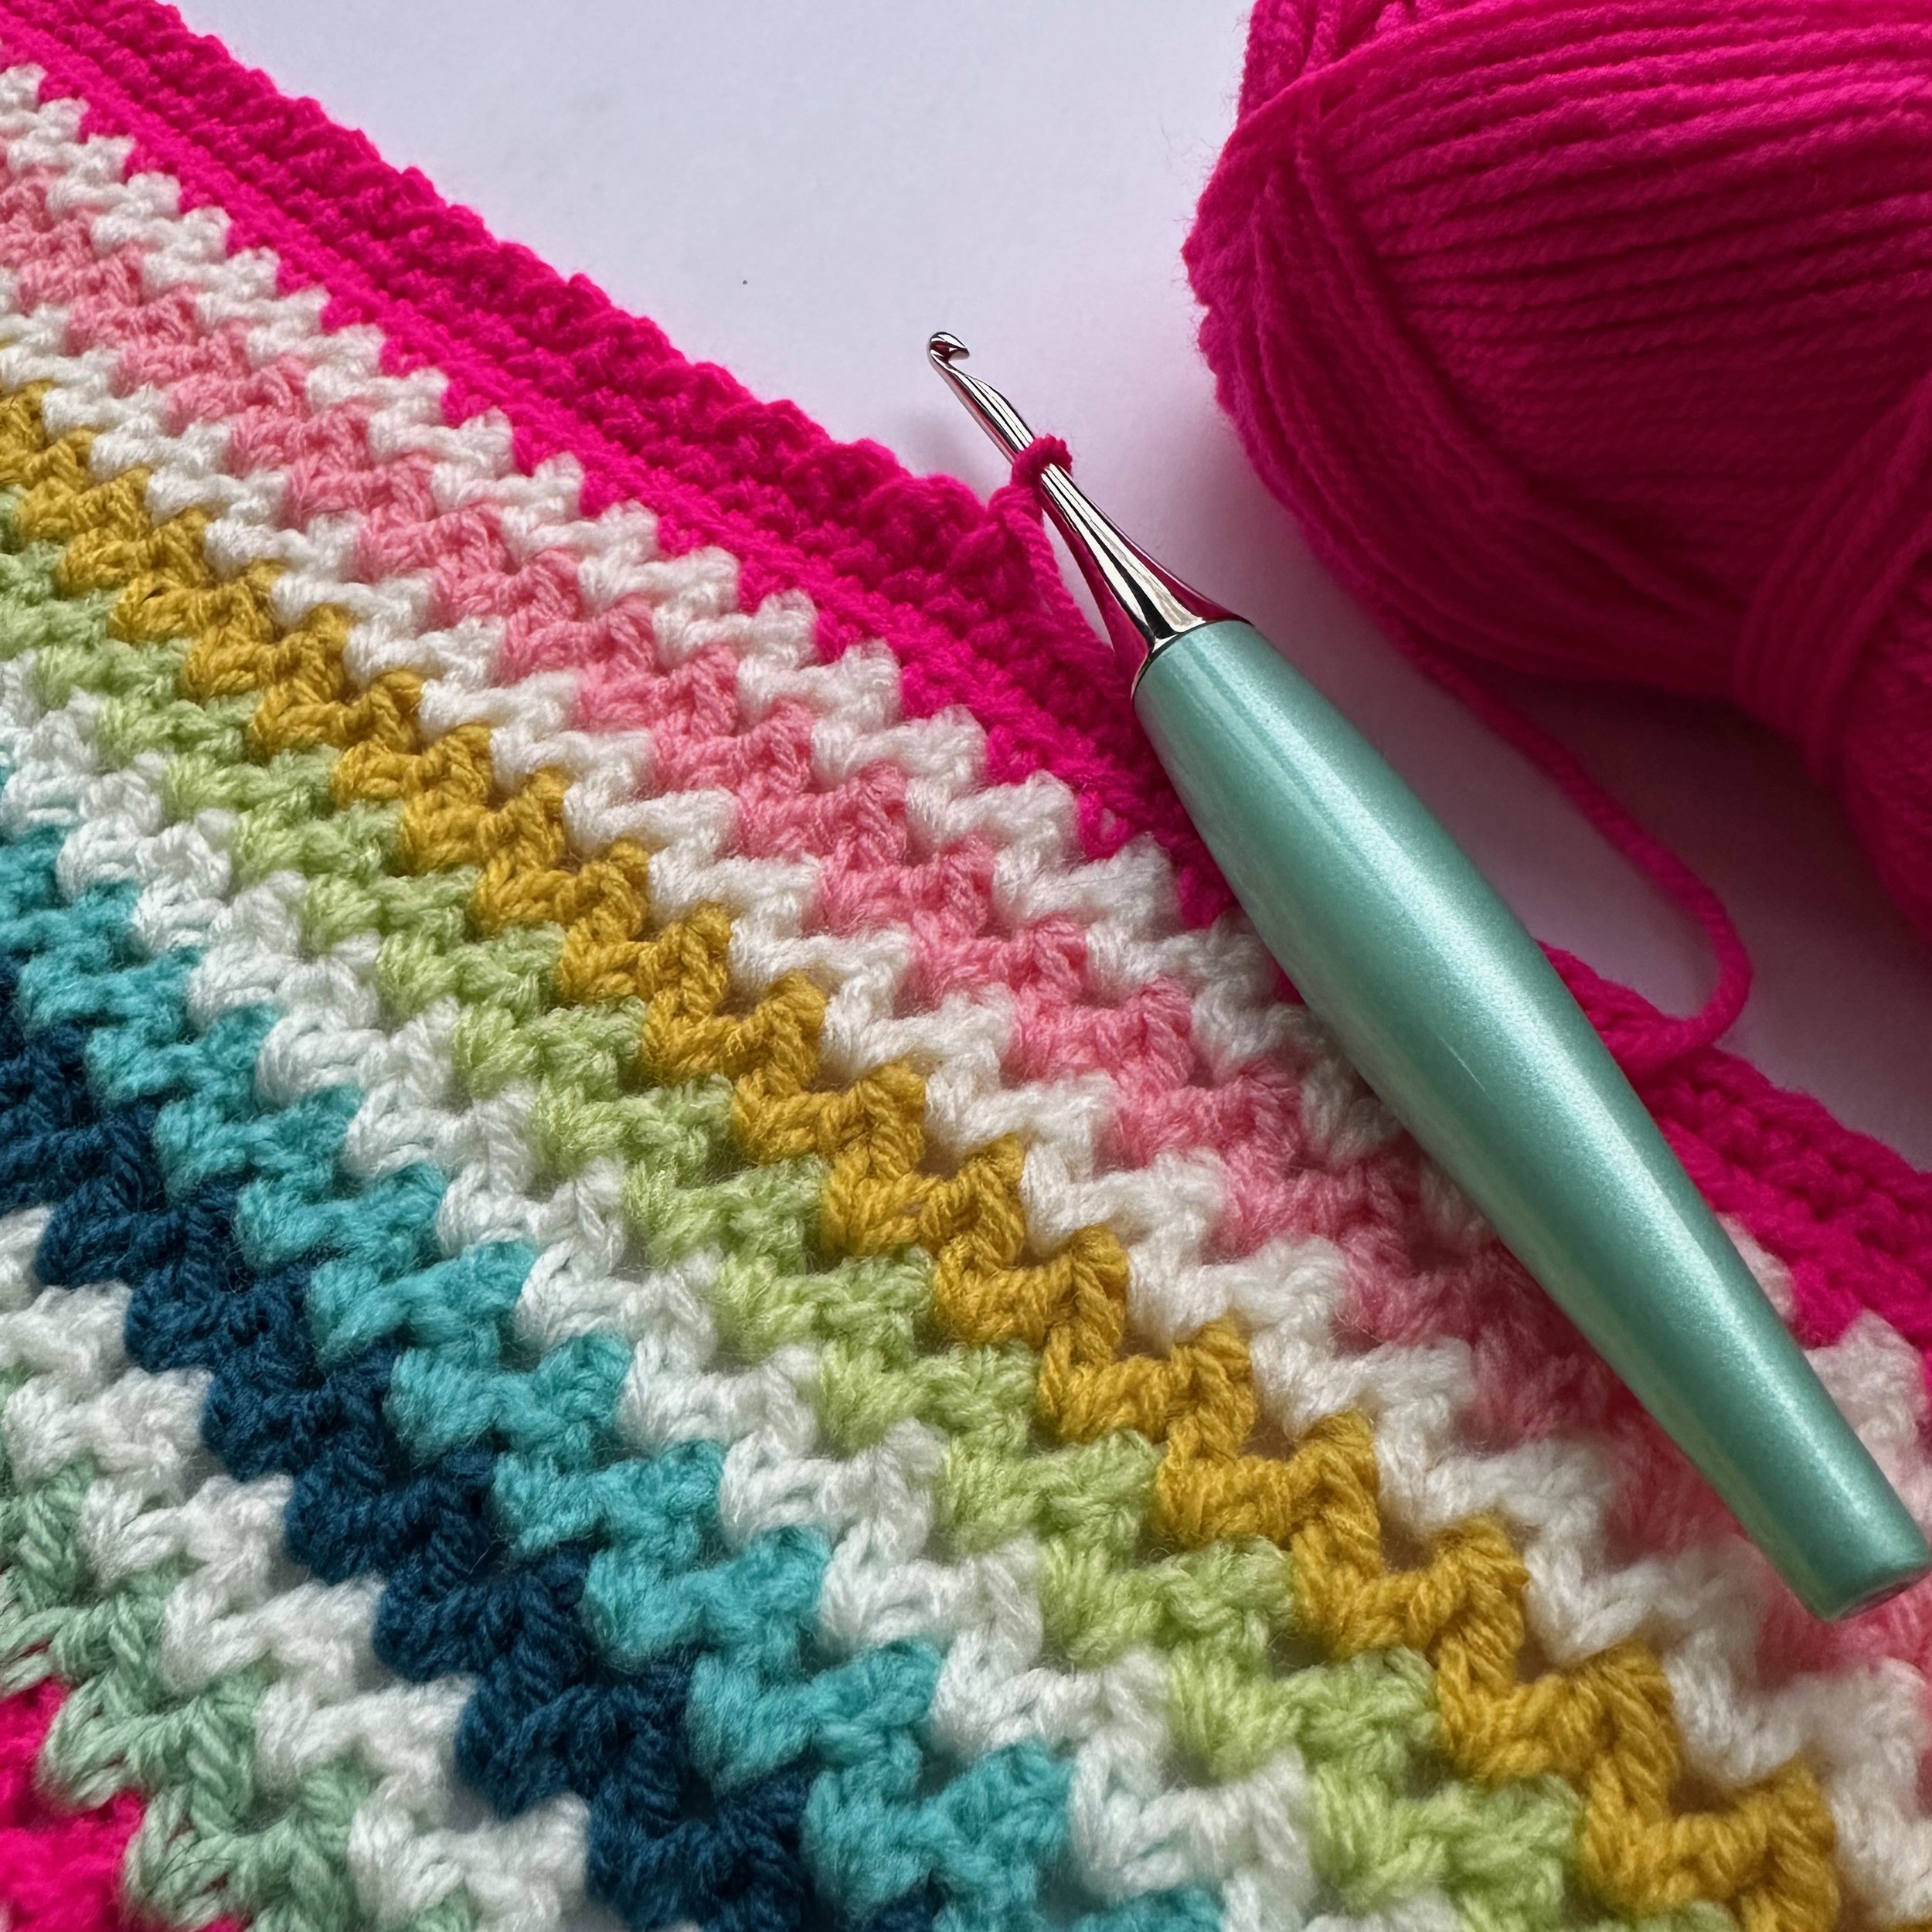
I’ve been making a bright new version for a friend in Sirdar Hayfield Bonus Dk. I have used:
Peacock
Spearmint
Gentle Jade
Lime
Gilt
Bright Coral
Cream
Pretty Pink
Neon Pink
Read on to find out how to work this wonderful stitch and add a pretty bobble border in ANY size, using ANY yarn.
These instructions give a guide to making the most common blanket sizes but will also allow you to work out the starting chain and approximate number of rows required for any size blanket in DK, Aran or Chunky yarn. The starting chain will always have an even number of chains.
The chart below gives the number of stitches needed in the starting chain for every 10cm of width required and rows for every 10cm of length required.

So, to make a blanket 100cm wide and 120cm long, in DK yarn, you will need a starting chain of 160 (10 x 16) and you will work 108 rows (12 x 9). I have worked out the most common sizes for you.

Here’s how to work the V Stitch
Terms
Treble crochet = US double crochet
Double crochet = US single crochet
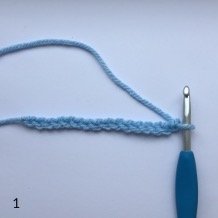

1. Foundation Row Chain the required number of chains. For this example, I have chained 16 using Aran yarn and a 5mm hook. Use the chart above to work out how long your chain needs to be, or use my handy Starting Chain Calculator here.
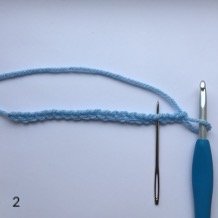
2. Chain 4 more chains. You will begin working in the fourth chain from the hook, indicated by the needle.
3. Yarn over, insert the hook into the fourth chain from the hook and pull up a loop (3 loops left on hook).
4. Yarn over and pull through 2 loops (2 loops left on hook).
5. Yarn over, skip one chain, insert the hook into the following chain and pull up a loop (4 loops on hook).
6. Yarn over and pull through 2 loops (3 loops left on hook).
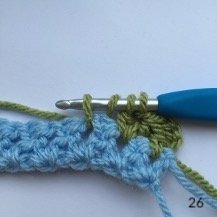
7. Yarn over and pull through 3 loops (1 loop left on hook).
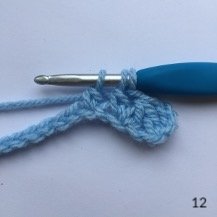
8. Now chain one to complete the stitch.
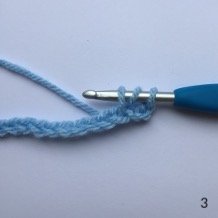
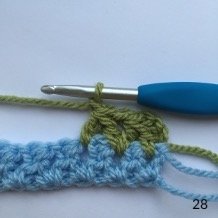
9. Yarn over, insert hook into the same chain and pull up a loop (3 chains on hook)
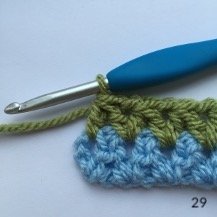
10. Yarn over and pull through 2 loops (2 loops left on hook).
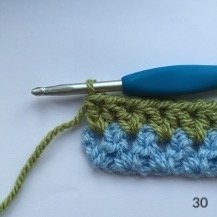
11. Yarn over, skip one chain, insert hook into following chain and pull up a loop (4 loops on hook). (Same as step 5)
12. Yarn over, pull through 2 loops (3 loops left on hook). (same as step 6).
13. Yarn over and pull through 3 loops ( 1 loop left on hook). (Same as step 7)
14. Now chain one to complete the stitch. (Same as step 8)
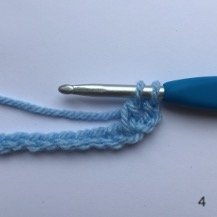
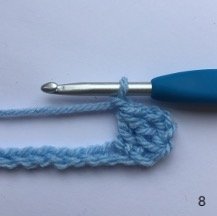
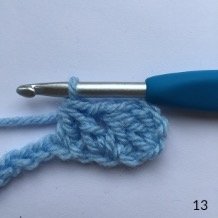
15. Repeat steps 9-14 along the whole foundation chain until you reach the last chain. Do not chain 1 to complete the stitch.
16. Instead of the chain 1, work 1 treble in the same chain. This will give you nice straight edges.
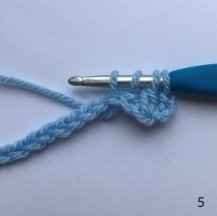
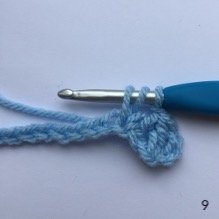
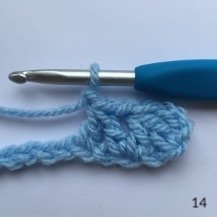
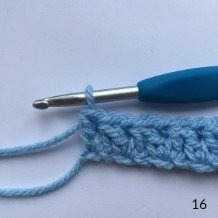
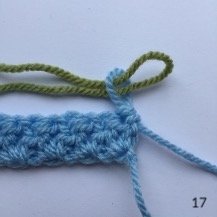
17. To continue working in the same colour chain 3 and turn. To change colour, turn the work over, cut off the first colour and pull through a loop of the second colour. Leave a tail of about 15cm on each. No need for knots.
18. Pull tight and chain 3.


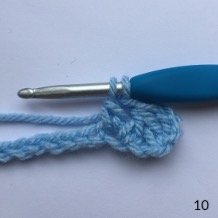
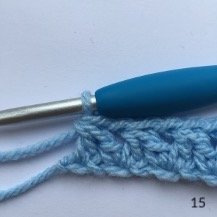
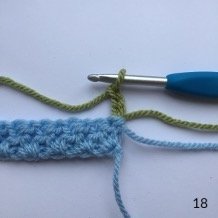
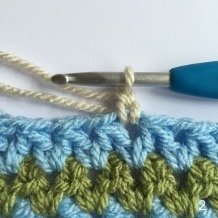
19. Row 1 Yarn over, insert hook between the last treble and the end of the v stitch and pull up a loop.
20. Yarn over and pull through 2 loops (2 loops left on hook).
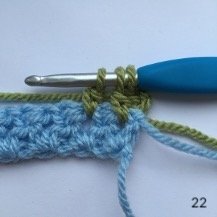
21. Yarn over, insert hook into the chain 1 space in the v- stitch below and pull up a loop. (4 loops on hook). Black lines indicate the ‘V’
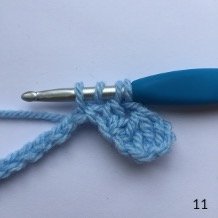
22. Yarn over and pull through 2 loops (3 loops left on hook).
23. Yarn over, pull through 3 loops (1 loop left on hook) and then chain 1 to complete the stitch.
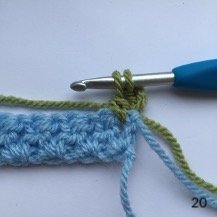
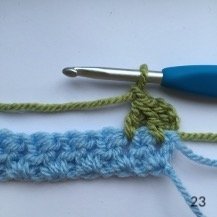
24. Yarn over, insert hook into same space and pull up a loop (3 loops on hook).

25. Yarn over and pull through 2 loops (2 loops left on hook).
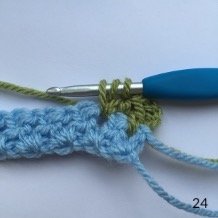
26. Yarn over, insert hook into next chain 1 space and pull up a loop (4 loops on hook).
27. Yarn over and pull through 2 loops (3 loops left on hook).
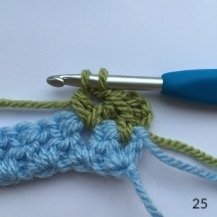
28. Yarn over, pull through 3 loops (1 loop left on hook) and chain 1 to complete the stitch.
29. Repeat steps 24 – 28 until you reach the end of the row. Do not chain 1 to complete the stitch.
30. Instead of the chain 1, work 1 treble in the same space.
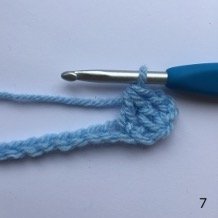
Work subsequent rows in exactly the same way as Row 1.
Laurelin of Snufflebean Yarn has made a video to show you how to work this stitch as well.
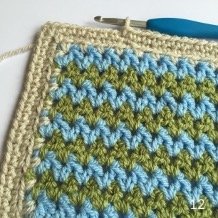
Adding a border


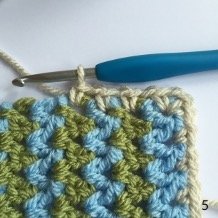
1. Sew in all the ends. Admire you lovely straight edge!
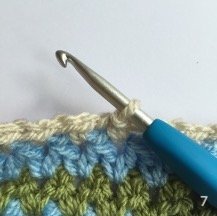
2. Join the border colour in the chain space of any v along the top edge. Chain 1.
3. Chain 1 and then double crochet (dc) in the next v.
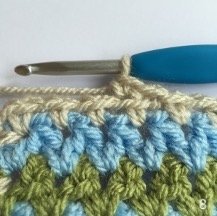
4. Chain 1 and dc in each v until you reach the corner. At the corner, dc, chain 2 dc in the same space.
5. Continue with chain 1, dc in each space all the way around the edge. Treat each corner like the first.
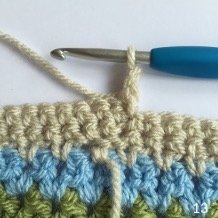
6. When you have worked all the way round, slip stitch to join. Don’t break off the yarn.

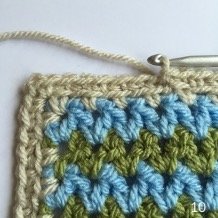
7. Chain 1. Now dc in the back loop only of the next stitch. Basically, you are making a dc through the middle of the stitch.
8. Working in the back loops only for this round will give a defined line formed by the front loops.
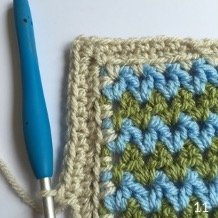
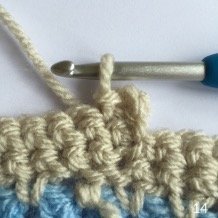
9. Continue with chain 1, dc in the back loop only of every stitch (chains and dc). At the corners dc, chain 2, dc in the corner space.
10. When you have worked all the way round, slip stitch to join. Don’t break off the yarn.
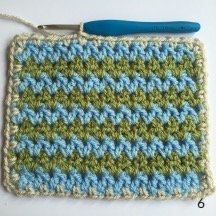
11. Chain 1 and then work a round of dc in each stitch, this time through both loops. Treat the corners in exactly the same way.
12. You can add as many rounds of dc as you want to obtain your desired border width.
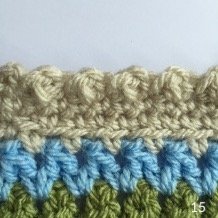
13. The final round of edging is worked on the wrong side so flip your work over and chain 3.
14. Now slip stitch in the next stitch. Now treble crochet in the next stitch and slip stitch in the one after. Alternate between treble and slip stitch all the way round. At the corners just work what ever stitch comes next. There is no need to do anything different.
15. When you turn it back to the right side, the alternating trebles and slip stitches will have formed a neat scalloped edge.
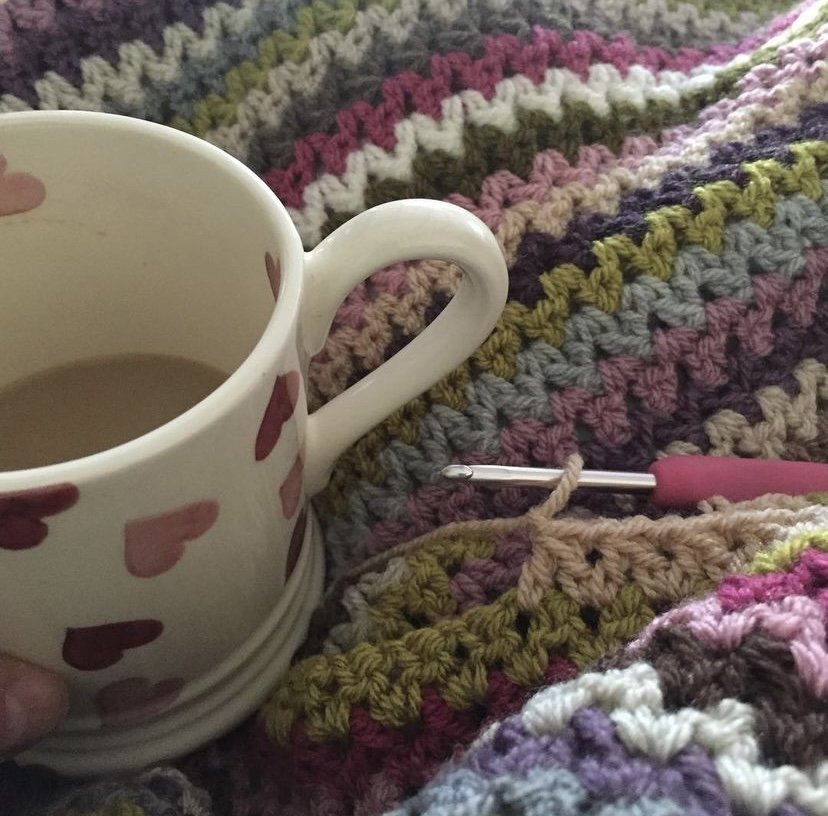
Why not give V-Stitch a try with odds and ends in your stash, like I’ve done here?

